|
Read the Labels
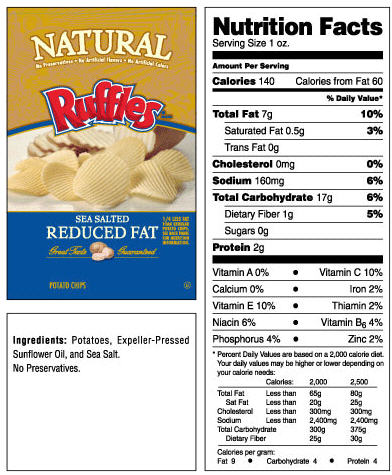
When I purchase a ready-made product, I look for
the following: About my recipes... When I put together a recipe, my goal is to balance protein, carbs and fat. I have a 33/33/33 lifestyle: 1/3 protein, 1/3 carb, 1/3 fat. I understand this is very different from the usual, especially for recipes, but it's how I lost weight and maintain my current weight. For me, it works, so that's what you'll see reflected in my recipes here.
Sugar... When I need to use a sweetener, I use Sucanat (sugar cane natural). I also use Agave Nectar and local honey.
Butter... I hardly use butter at all. In fact, I can't think of anything I use it for other than holiday baking (and even that is limited). For a long time, I kept I Can't Believe It's Not Butter in the fridge for the family, but based on research I've done, real butter is a source of MCFA (medium chain fatty acids) that are actually beneficial, so now I stock only real butter. Whole Foods carries a Fresh, local butter, as do the local farmer's markets.
Sour Cream... I either use Light Sour Cream (if I'm splurging) or I use fat-free plain yogurt or fat-free cottage cheese. I get the boost of extra protein, that way, too!
Cheese... I use reduced-fat feta for most of my cheese needs. For the family, I get 2% cheddar, 2% mozzarella, etc. And we go through a lot of string cheese! :-) Occasionally, I use Parmigiano-Reggiano - but like any cheese, you don't need a lot.
chelle @ RecipeForFitness.com
Recipe resources
Cookbooks by Devin Alexander!
The Eat Clean Diet, Cookbooks and
Workout...
Clean Eating
Magazine... |
View Figure
Competition Friendly Recipes HERE A Word About Sodium...The USDA/FDA recommend that we limit sodium consumption to less than 2,300mg per day (see guideline). They further suggest that middle aged or older adults limit that to less than 1,500mg. Take a look at some well known restaurant menus and you'll discover shocking amounts of sodium. Subway, for instance, has 1,200mg of sodium in a 6" Turkey on Wheat. That is one meal! It's my WHOLE daily allowance of sodium, in ONE sandwich! That's healthy?? Sure it may be low fat, but can anyone say water retention? How about Hypertension/High Blood Pressure, Stroke, Heart Attack?? That's crazy stuff! And as you look around, you'll see it in other places too, like protein bars! !!?? Generally, my recipes are low-sodium... I've discovered that with my clean diet, I am incredibly sensitive to sodium. If I have a treat/cheat meal, within 20 minutes my feet, ankles and fingers are so swollen they hurt! That's how fast I react. Everyone is different, though. Sodium barely fazes Bill, my husband. But hey, better safe than sorry! I reduce sodium, and look for foods high in potassium (reduces sodium levels in the blood - USDA/FDA recommend 4,700mg per day of potassium!). It's important to note that sodium is necessary to the human body. We need a certain amount... we just don't need Subway levels! At home, it's so easy to switch Mrs. Dash instead of Table Salt... Sea salt has lower sodium levels than regular salt, too, and can give some unique flavors, depending on where it's from. Reducing sodium doesn't mean giving up flavor! Contact me anytime! chelle @
RecipeForFitness.com |
||||||||||||||
|
Some
Favorite Recipes... |
|||||||||||||||
|
Protein Banana-Doodles (breakfast cookie)
Are You
a Victim of Sucky Diet Syndrome? Eat a COOKIE!
Chelle's
Banana-Doodles
Dry Ingredients:
○ Back to Top ○
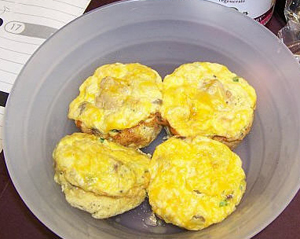
I love easily portable food :-) I've seen recipes for mini meat-muffins/loaves all over the internet for years, but have never really found one I like. Then came competition diet, and I really needed something that was easy to make, eat, and didn't knock me off track with carbs. Most recipes include bread crumbs or quinoa, rice or other starchy carb. I needed a solution without those extra carbs... I utilized my free foods to fill out the recipe and add flavor (mushrooms, onion, garlic), then added shredded zucchini and diced pepper for a veggie boost, plus the egg both to hold it all together as well as provide a healthy source of fat. The result was an incredibly tasty mini loaf! The hubby even loves these! Just add a side (quinoa, rice, etc) and a veggie and you've got a full meal for the family (or yourself!). Chelle's Recipe
2 lbs
ground chicken breast Spray Muffin Tin or Mini Loaf pan with oil. Preheat Oven to 400 degrees Mix all ingredients, then divide among 8 muffins or loaves. Bake 20-30 minutes, draining pan at about 20 minutes. When done, serve immediately, or cool on wire wrack and individually wrap for snacks/meals.
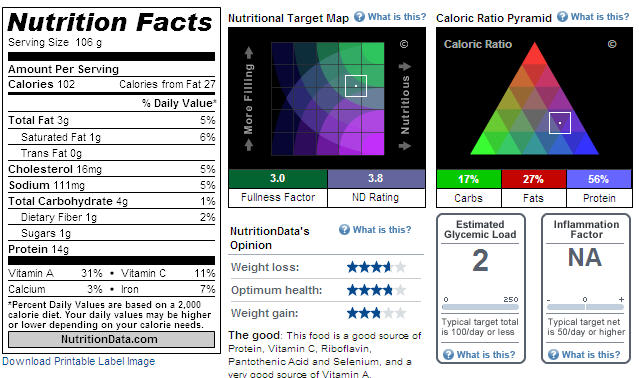
Nutrition data is per mini-loaf:
○ Back to Top ○
This is an awesome alternative to Tilapia, or any other fish. It's a bit denser than tilapia, but still sweet and without a fishy flavor. It absorbs spice flavor, so whatever you use with it, is what you'll get! Plus, it's lower calorie than tilapia, so you can have more food for less calories! NICE! Recipe
Filets of
Swai
Directions: Bake at 350 for about 15-20 minutes, checking often in the last 5-10 minutes. Fish will be white, moist and flakey. Serve immediately, or refrigerate in portion sizes in ziploc baggies. I like to do a day or two's worth at a time.
○ Back to Top ○
Shredded Meat / Stuffed
Chilies
I love a good roasted stuffed chili, but being on competition diet, I can't do the usual cheese, breading, etc. This version is super-simple, but incredibly tasty! The only change I'd make, post competition diet, is to add some feta! Recipe
Roasted
Chilies (Anaheim, Pasilla, whatever appeals to you!)
To
roast chili peppers...
To
cook the meat...
For
each chili... Mix the meat & salsa (and cheese if using) together, then gently stuff inside the chili pepper. You can either heat in the oven (350 for about 10-15 minutes) or in the microwave.
○ Back to Top ○
Quinoa Pizza Crust /
Flatbread
This recipe is fun! It's easy to do, though be sure to oil those pans, lol. The result can be a great pizza crust, or simply a tasty flatbread! The original recipe can be found here: http://forlifepersonalchef.com/2011/01/25/pizza/ Recipe
2 8" Pie
Pans Soak overnight.
1/2 cup
water
Drain
quinoa. Preheat oven to 450. Oil pans (I sprayed mine to reduce the
oil).
Place pans
in oven until shimmery hot, but not smoking. Remove from oven. Recipe makes 2 crusts. With each crust cut into 4 pieces, the nutritional info is for one "slice" (1/8th of the recipe).
**I used nowhere near this amount. I used my Misto, and gave each pan a good spray and that was plenty.
○ Back to Top ○
Chelle's Protein
Zucchini Muffins
This recipe is a result of my desire for an on-the-go meal replacement. At lunch, I need a lean protein, a starchy carb, and a veggie with a bit of fat. These hit it all, plus - hello, frosting! I had a lot of fun developing these, and while there's no added sugar/sweetener, I think they turned out pretty good :-) As a breakfast, 3 muffins would be about the same as my oatmeal with protein powder/ground flax.
Chelle's Protein
Zucchini Muffins
1/4 cup dry
oatmeal/rolled outs - ground to flour (in a coffee grinder, or just use
1/4 cup oat flour) Mix together the dry ingredients. In a separate bowl, mix the wet ingredients, then blend together with the dry. When nearly blended, add the cup of shredded zucchini and mix together. Spray a muffin tin with clean oil (I use coconut). Divide the batter into 6 muffin cups. Bake at 350 for about 20-24 minutes. (I start at 15 and check them every 3 minutes until they're just starting to go gold/brown on top - don't over-bake these! You'll end up with a dry nasty rock.) Remove from oven when a knife inserted comes out clean (even if they don't look done). Set on cooling rack. Mix frosting: In a small bowl, mix 2 Tbsp vanilla unsweetened almond milk with 1/2 tsp vanilla. If you like, add 4 drops of your favorite Capella flavor drop (I like either Caramel or Apple Pie with these muffins). Slowly add liquid to 1 scoop vanilla protein powder, stirring constantly. When all liquid is incorporated, you can add a few drops of coconut oil to "smooth" out the icing. Divide icing among the six cooled muffins. Store in airtight container in fridge. Nutrition info is per muffin. Recipe makes six full-size muffins, frosted.
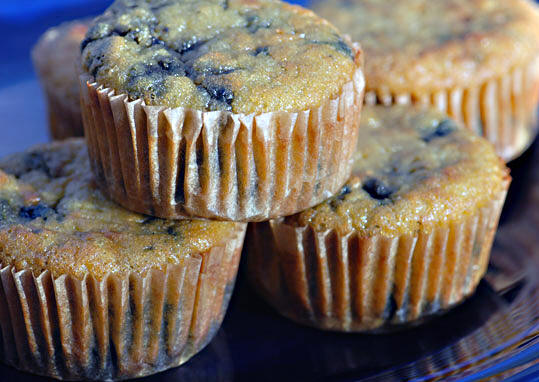
Blueberry
Protein Muffins
1/4 cup dry
oatmeal/rolled outs - ground to flour (in a coffee grinder, or just use
1/4 cup oat flour) Mix together the dry ingredients. In a separate bowl, mix the wet ingredients, then blend together with the dry. When nearly blended, add the cup of shredded zucchini and mix together. Spray a muffin tin with clean oil (I use coconut). Divide the batter into 6 muffin cups. Bake at 350 for about 20-24 minutes. (I start at 15 and check them every 3 minutes until they're just starting to go gold/brown on top - don't over-bake these! You'll end up with a dry nasty rock.) Remove from oven when a knife inserted comes out clean (even if they don't look done). Set on cooling rack. Mix frosting: In a small bowl, mix 2 Tbsp vanilla unsweetened almond milk with 1/2 tsp vanilla. If you like, add 4 drops of your favorite Capella flavor drop (I like Caramel with these muffins). Slowly add liquid to 1 scoop vanilla protein powder, stirring constantly. When all liquid is incorporated, you can add a few drops of coconut oil to "smooth" out the icing. Divide icing among the six cooled muffins. Store in airtight container in fridge. Nutrition info is per muffin. Recipe makes six full-size muffins, frosted.
If you choose to not frost the muffins, here's the nutritional info...
○ Back to Top ○
I've known that you can take the oatmeal protein powder mix (from my regular breakfast) and mix it thinner (more water) for a pancake batter, but I'd never tried it until recently :-) I used vanilla unsweetened almond milk in place of the water and they turned out fantastic. I topped them with my fruit "syrup". Oatmeal Protein Pancakes
1/2 cup dry
oatmeal
Heat
skillet on stove. Scoop onto hot skillet (spray with coconut oil first). I use 1/4 cup measuring cup, and get 4 pancakes out of the mix. Top with (depending on your dietary needs): Natural nut butter, real butter, real maple syrup, fruit "syrup" (see below).
○ Back to Top ○
I really wanted something "sweet" on my oatmeal protein pancakes, but couldn't do any type of sugar (honey, maple, etc). But... I realized that since I was eating these post workout (heavy workout), I could do fruit (after a heavy workout, your body needs a hit of simple sugars to help restore glycogen reserves). So I tossed some fruit in a sauce pan and away I went! Chelle's Fruit "Syrup"Fresh
fruit of choice (I've done this with 1 cup of blackberries, and another
day with a 4.4 oz container of blueberries) Mix all ingredients in a small sauce pan over med-high heat until bubbly. Reduce to low & simmer, stirring often to break down the fruit. Cook until it's reduced to a syrup consistency.
Nutrition Info: This is for the Blueberry version... I'm not sure if the nutrition data changes once you cook down the fruit, but here's the data (see right). VARIATIONS: Blueberry - 1 cup blueberries plus 1 tsp vanilla and 2 Tbsp water. Bring to boil, then reduce and simmer, stirring often.Blackberry - 1 cup blackberries plus 1 tsp vanilla and 2 Tbsp water. Bring to boil, then reduce and simmer, stirring often.Strawberry-Banana - 3 medium strawberries, diced, plus 1 small banana, sliced. Add 1 tsp vanilla & 2 Tbsp water. Bring to boil, then reduce and simmer, stirring often.
○ Back to Top ○
Chelle's Quinoa
Pudding / Porridge
I've been wanting something sweet and creamy, but on a Figure Competition diet, that's a little difficult to come by. Well I pulled it off with this one! A little playing around in the kitchen and I had a quinoa pudding/porridge that even the family loved! Nice! :-) Chelle's Quinoa Pudding / Porridge 2.5
cups cooked quinoa After cooking the quinoa, instead of setting it aside to cool, I added the almond milk, sea salt, cinnamon and stirred. Once incorporated, I sprinkled in the protein powder, a little at a time, adding more almond milk as needed. Once the consistency and flavor I wanted was achieved, I let it cool slightly then separated it into 5 small containers. This is my lunch dessert :-)
○ Back to Top ○
Chelle's Jello's without
sweetener
I love jello. Seriously love. While I know that the wiggly-jiggly-yumminess is not for everyone, I absolutely love it. And I figured out how to make it without sweetener! I can't use fruit juice & I'm doing my darndest to avoid artificial sweeteners... So what does that leave me? Well, my crazy-craving for jello lead me to a couple different varieties.. the first is made with Glutamine. That's right. Glutamine Select (with BCAA's) from Beverly International, to be exact. This delightful (and naturally flavored) powder mixes with water - you sip it before, during, after workout/cardio, or during the day to help with cravings. It's black cherry flavored. And it makes yummy jello :-) The second variety is made with tea! Chelle's Glutamine Gelatin 1
packet unflavored gelatin Mix the glutamine in the water, until dissolved. Add 1/2 cup of the mixture to a bowl. Bring the other 1.5 cups to a boil (watch it, if it boils over you'll have a mess on your hands). Sprinkle the gelatin over the half cup liquid and allow to sit for one minute. Pour the boiling 1.5 cups liquid in and stir for 5 minutes. Cover and refrigerate until set. Each half cup serving has 30 calories, 7 g protein. That's it. Awesome!! Click on the image to the right to learn about the Glutamine supplement I take.
Chelle's Tea Gelatin 4 tea bags - any flavor1 packet unflavored gelatin 2 Cups Water Boil 2
cups water. Add tea bags and allow to steep to desired strength. Sprinkle the gelatin over the cold half cup liquid and allow to sit for one minute. Add the boiling 1.5 cups liquid in and stir for 5 minutes. Cover and refrigerate until set. Each
half cup serving has 30 calories, 7 g protein. That's it. Awesome!!
○ Back to Top ○
Protein Powder / Ziploc Ice
Cream
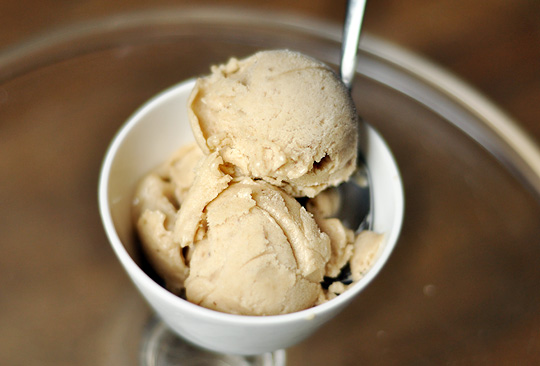
Back in junior-high, we made ziploc ice-cream... where you put ice and salt in a big bag, and your ice cream ingredients in a smaller bag, then the small bag goes in the big bag (sealed of course), and you shake... voila! ice cream! Jamie Eason gave me the idea to use protein powder and almond milk to make this not only healthier, but competition-diet-friendly! I played around with it until I came up with the exact texture I like :-)
**I
recently picked up a
Cuisinart Ice Cream Maker, and it works fabulously with all the
recipes below! I just pour in the ingredients, turn it on and 20 minutes
later I have ice-cream! Directions: Put ice in a large ziploc (about half full), add 1/2 cup table salt (don't waste your sea-salt for this, use the crappy iodized stuff). The salt makes the ice colder (just like in an ice cream maker). BLEND
together:
VERY
IMPORTANT - BLEND YOUR INGREDIENTS FIRST Pour the mixture into a smaller ziploc, seal, then place the bag inside the larger bag. Seal. Wearing oven mitts (Thanks for that tip too, Jamie Eason!), shake the bag vigorously until the inner bag is frozen... you can do "soft-serve" or "hard"... whatever you like. It takes about 5 minutes for the ice cream to go "hard". Variations... Use any nut/seed butter in place of the coconut butter. Add cinnamon! Add a sweetener (honey, agave, maple) if your diet allows for it. Omit the nut/seed butter... put in whatever you want! You can even add fruit to your blender, if your diet allows! You can also adjust the amount of protein powder and almond milk to best suit your dietary needs. DREAMSICLE
(orange/vanilla): 1 scoop vanilla protein powder, 1 tsp vanilla extract
(pure), 1/4 tsp orange extract, 1 cup almond milk (vanilla,
unsweetened). CHOCOLATE PEANUT
BUTTER MINT CHOCOLATE
(CHIP) MOCHA STRAWBERRY CHOCOLATE FUDGE
BROWNIE
○ Back to Top ○
Quinoa is a fabulous, high protein "grain". It's actually a seed. Always rinse your quinoa. Even if the box says pre-rinsed. There is a bitter coating on the seeds, and you don't want a taste of that, lol! Preparing quinoa is easy - no worries! For every cup of quinoa, use 2 cups liquid. You'll know it's done when the liquid is mostly absorbed and the germ pops out - in other words, it'll look like the grains sprouted little tails :-) You can change up the flavor & look easily... use different flavored broths instead of water, use seasonings (love me my Mrs Dash!), add a can of diced or crushed tomatoes, green chilies, black beans... whatever! There are multiple colored varieties, too... I love to mix 1/3 cup of white, 1/3 cup of red, 1/3 cup of black all together. It's pretty!
Cooking quinoa: Resources:
○ Back to Top ○
Smoothies are a fantastic choice to get a quick, nutritious meal or snack - BUT... check the labels (or nutritional info) on popular smoothies and you might be surprised... TONS of added sugar, even HFCS & other junk! All you need to make a winning smoothie is a good plain Greek Yogurt and fruit. That's all! Choose your Greek yogurt wisely - they're not all the same. I use Chobani (either 0%, 2% or 4% depending on what I need). It isn't as bitter as other yogurts, and it's lower in sugar & higher in protein. Recipe Makes 1 serving
Ingredients Blend until smooth. There are no added sugars, so the only sugar you'll get in this is naturally occurring sugar from the yogurt and fruit. If you're watching your sugars, only use one cup of fruit. If it's not a problem, or you're enjoying a treat, go for the 2 cups. You can use either fresh or frozen fruit, or a combination of both. For summer, you can also mix this up then pour into popsicle molds and freeze. Little bit of awesomeness, right there :-) Here are some sample combinations of fruit that my kids LOVE:
Banana,
Strawberries, Peaches
○ Back to Top ○
If you love dark chocolate - you absolutely MUST try this! It's super easy to put together, and it is incredible!! This is soooo unbelievably good! When I made it, I nearly stopped before folding in the egg whites because the fudgey mixture was beyond words... I'm glad though, that I finished, because the mousse pie is a gift from the gods! It's that good! Though, next time, I might make a batch of just the fudgey part along with the pie :-) The recipe calls for a crust - I made it without. The nutrition information below reflects the recipe without the crust. Source: ElanasPantry.com Recipe Makes 16 servings (see nutrition data below) Ingredients
1 2/3 cups
dark chocolate chips 73% cacao
(I used
1.5 cups of 78% dark)
Preparation
○ Back to Top ○
Jillian Michael's
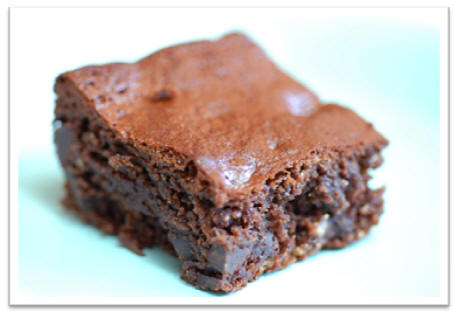
Fudge Brownies
I haven't tried these yet, but intend to very soon :-) Source: JillianMichaels.com Recipe Makes 16 2-inch servings (see nutrition data below)
Ingredients
Preparation
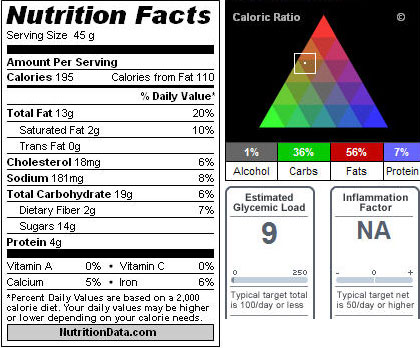
Nutrition information from NutritionData.com. To view complete data, go to: http://nutritiondata.self.com/services/referral?messageKey=fc1dcb863640bdffa665ea93b350e340&report=$report
○ Back to Top ○
This is soooo good!!! The recipe calls for Flounder, but we've done it with Halibut, Cod, Tilapia, Chicken and Pork... it's been a hit all the way around! The only change, is if you make this for chicken or pork (or anything with a longer cooking time) wait to add the pecans until the last 10-15 minutes. I love to serve this with Chipotle Smashed Sweet Potatoes! Source: Clean Eating Magazine April/May 2011, pg 44/45. Recipe Makes 4 servings
Olive Oil
Cooking Spray ONE: Preheat oven to 425 °F Line a large baking sheet with aluminum foil and coat foil with cooking spray. Place fillets on foil. TWO: In a small bowl, combine honey, mustard, stevia (Sucanat), salt and cayenne. Brush tops of fillets with mustard mixture, dividing evenly. Sprinkle pecans over top, dividing evenly, and coat tops of fillets with cooking spray. Bake for 12 minutes or until fish flakes easily with a fork. NOTE: Chicken or pork take longer. Typically ours cook in about 25-40 minutes, depending on the thickness of the meat. The last 10-15 minutes of cooking, add the pecans.
○ Back to Top ○
Tracey's Raisin Almond Granola
If you're a member of the toscareno.proboards.com forum, you'll know Traweaver. This is her incredible recipe for granola. My family absolutely loves this! My husband eats it as cereal, everyone snacks on it, and my favorite is to add it to my plain greek yogurt - little bit 'o heaven there! :-) Recipe Makes 35 servings
○ Back to Top ○
Chelle's Meatloaf
& Smashed Potatoes
Needing a quick but man & family friendly dinner, I threw this together and was happy to get the thumb's up from Bill & the kids :-) I serve it alongside smashed potatoes (see below) & steamed green beans. Recipe Makes 6-8 servings
2 lbs
lean ground beef Spray an 8x8 pan with olive or coconut oil. In a bowl, mix all ingredients except the bbq sauce. Press into pan. Spread the bbq sauce over the top. Bake at 450 for 30 minutes. Carefully drain off liquid and return to oven for 10 minutes. Check for doneness. If not cooked through, continue cooking in 10-15 minute increments.
Alternative: Instead of an 8x8, use muffin tins! This makes easily portable leftovers :-)
Chelle's Smashed Potatoes Potatoes are a fabulous source of potassium (mostly in the skin)! Don't be afraid to enjoy "white" potatoes while eating clean. Typically, I don't eat starchy carbs in the evening, unless it's a treat, but the rest of my family does, so this makes a great "comfort" food that's also very healthy.
1 1/2
to 2 Lbs Yukon Gold potatoes (don't peel) Chop potatoes into chunks and boil in salted water until tender. Drain. Add butter, milk & Mrs Dash and smash with a fork (keeping the skins). If you want a more "mashed" texture, use a hand mixer and blend until you reach desired consistency. ○ Back to Top ○
Chipotle Mashed Sweet
Potatoes
Based on a recipe by Devin Alexander, but cleaned up. Recipe Makes 6-8 servings
3 large
sweet potatoes (the orange ones) Peel sweet potatoes and cut into 1-inch chunks. Boil in salted water until tender. Drain. In a bowl, add the sweet potatoes, butter and chipotle peppers. Beat (I use a hand mixer) until reaching the desired consistency (we like them a little bit chunky). Serve.
○ Back to Top ○
Lemon & Dijon Chicken with
Panko Crust
Consumer Reports Food & Fitness, Winter 2011 offered up this yummy recipe. I've been experimenting with Panko, and this is the best recipe I've tried to-date. Recipe Makes 6-8 servings Ingredients:
2 tbsp
dijon mustard 1. Heat oven to 450. Whisk mustard, garlic, lemon juice and 1/2 tsp salt and black pepper in a large bowl. Add chicken; turn to coat. Set aside. 2. Mix breadcrumbs, thyme, lemon peel, remaining salt and cayenne pepper in shallow bowl. Place wire rack on rimmed baking sheet. Spray with olive oil. Coat Chicken in breadcrumb mixture and place on rack. Spritz lightly with olive oil spray. 3. Bake chicken 25 minutes, or until cooked through, covering loosely with foil during the last 5 minutes of baking time if chicken is browning too much.
○ Back to Top ○
This recipe gem was featured in Fitness Magazine (Sept. 2010, pg 148) and was created by Rocco DiSpirito. 4 servings isn't enough for my family, so I doubled the recipe, though still used the 8x8 and it was absolutely incredible! Super Yummy! Full batch of thumbs-up from my house! :-) The original recipe (not doubled) is below. *Note... make the onion-garlic puree first
Rocco's Recipe
Ingredients:
Nonstick
cooking spray (I used olive oil)
1. Preheat
oven to 425. Mist an 8x8 baking dish with oil. Set it aside.
ONION-GARLIC PUREE
Recipe nutrition info: Serving size about 2/3 cup. 237 calories, 17g protein, 31 g carbohydrate, 7 g fat (4 g saturated), 3 g fiber.
○ Back to Top ○
This is so good!! You can boost the protein (I often do) by adding shredded chicken breast. I've been making this pizza for years, and it's a fast and nutritious dinner. Next time, I'll take a photo. :-) Chelle's Recipe Ingredients:
1
Pizza Crust - Alvarado St Bakery, Sprouted California Style, Original
Directions: Bake at 450 for 10 minutes. Allow to rest for a couple minutes, then slice. Top with shredded lettuce & salsa.
Makes 8
slices Topping options: Chopped tomato, diced green chili, shredded chicken.
Nutrition
info is figured on NutritionData.com. This is a rough estimate, per
slice.
View my recipe on NutritionData.com here.
http://nutritiondata.self.com/facts/recipe/1949551/2#ixzz1C4Sa8OtQ ○ Back to Top ○
Protein Microwave Chocolate Cupcake with Fudge Sauce Biochemista.com had a great recipe for a Microwave protein cupcake that looked like fun! I tried it, tweaked it and this was the result. I added my own recipe for fudge and YUM! :-) Let me tell you, the fudge MAKES this! It was a hit at my house, and everyone loves how fast and easy it is to whip up! Give it a try when you NEED that chocolate fix! :-) [you can find biochemista's original recipe here ] Protein Powder Cupcake Ingredients:
1 scoop chocolate
protein powder (I use Beverly Ultimate Muscle Protein - Awesome!)
Mix all ingredients
in a small bowl. NOTE: This is HOT!! Be careful! While it's cooling (you want it warm, just not scorching), make the fudge sauce... Chelle's Fudge Sauce Recipe Ingredients:
2 Tbsp unsweetened
cocoa powder (I use Valrhoma) Mix together in a small glass bowl and microwave for 20 seconds. Stir well until you get a thick fudgy sauce. Frost it over bites of the protein cupcake. **Note... about protein powders. I've tried so many I lost count. The only one I like is Beverly's Ultimate Muscle Protein Powder. It bakes, it mixes, it blends and it tastes incredible. I tried this recipe using the Vanilla powder, too, but it was a total fail. Yuck. Chocolate was the way to go! :-)
○ Back to Top ○
Chelle's Cheesy Brown Rice - Baked This is so easy! And changing the flavors is super simple! Just swap out the seasonings and the cheese! Feeling Italian? Use Mozzarella and Mrs Dash Italian Herb. Mexican? Use Sharp Cheddar or Pepper Jack and Mrs Dash Southwest Chipotle. Easy! Chelle's Recipe Ingredients:
4 cups cooked brown
rice Preheat oven to 450. Spray an 8x8 pan with Olive Oil. In a bowl, mix together the cooked rice, cheese and Mrs Dash. Pour into bowl and bake for 10-15 minutes. Top will be golden and "crunchy", inside will be delicately herbed and cheesy. Yum!
○ Back to Top ○
I saw a recipe in Devin Alexander's book, I Can't Believe It's Not Fattening, and wondered if I could clean it up... turned out it was simpler than I imagined! I just swapped out processed ingredients for clean! I'll get a photo up the next time I make it (which according to the family is SOON!) Chelle's Recipe Ingredients:
1 package Cheese
& Garlic Croutons (Look for a brand that is made with whole grain
bread and includes no preservatives or additives. I found mine at
Whole Foods.) In a large ziploc bag (I use gallon size), add the chicken and buttermilk. Seal and marinate a minimum of 6 hrs (I do overnight). *Do not skip this step! This is what makes the chicken fabulous and keeps the breading on. Place Croutons in a bag and smash them into crumbs. Add the panko crumbs & Mrs Dash, mix well. When ready to cook, preheat oven to 450. Spray a 13x9 pan with olive oil. Add the crumbs/panko to a large bowl. Pick up chicken piece and allow excess buttermilk to drip off (there will be a nice coating of buttermilk on the chicken... you want that). Place each piece of chicken (one at a time) in the crumb mix and coat well. Place in pan. If there's leftover crumbs, gently press into the tops of the chicken, then spray lightly with the Olive Oil. Bake for about 15 minutes (depending on the thickness of your chicken), then carefully flip the pieces over and bake for another 15 minutes. Check for doneness (not pink inside). Serve! **I served this with my Cheesy Brown Rice and steamed Broccoli**
○ Back to Top ○
This is my own original recipe, and though it has gone through a few evolutions, it is now totally clean! It's super healthy, incredibly yummy, and while time consuming to create it is very worth the effort. I've been making these for almost 20 years and my family informed me this year's batch were the best ever (and ironically, the healthiest! LOL!) FYI... They freeze and reheat very well, too! Chelle's Recipe Ingredients :
12
flour tortillas (either make your own, or purchase the cleanest you
can find) Directions:
Scramble the eggs & set aside. Preheat oven to 350. Grease a 13x9 pan (I use real butter, which is mostly MCFA-medium chain fatty acid and SCFA-short chain fatty acid, and actually good for you!). In a large bowl, gently mix together the rice, cooked potatoes, green chilies, cooked beef, canned tomatoes (do not drain) and the scrambled eggs. Add about a tablespoon of mashed beans to each tortilla and spread it around. Add a scoop of the potato/egg/chili/beef/rice/tomato mixture. Add 1-2 slices of cooked bacon. Add 1-2 tbsp of grated cheddar. Roll up and place in pan, seam-side down. When all tortillas are filled, sprinkle a few more tbsp of cheddar over the top. Cover with foil and bake for 20 minutes, then remove foil and bake another 5-10 until golden on top. Serve with the greek yogurt (instead of sour cream), salsa, taco sauce etc. I like to mix a bit of Sriracha sauce with greek yogurt and drizzle that over the top. You can also serve with guacamole or chopped avocado. This dish can be prepared the night before & refrigerated until you're ready to pop it in the oven. Just bake until they're hot all the way through. It can also be cooked, cooled, then individually frozen for convenient meals!
○ Back to Top ○
This is so easy! I use the 10 minute bags of brown rice for convenience, but you can easily use regular "loose" rice. Chelle's Recipe Ingredients:
2 bags of 10 minute whole grain brown rice
In a pan, pour broth, then add water to appropriate level.
Variations...
○ Back to Top ○
This hearty stew feeds my family of 6 and provides leftovers! Chelle's Recipe
Ingredients:
DIRECTIONS: Optional - Add pasta (I use egg noodles). Just prepare the pasta as normal, then spoon stew over the noodles in bowls. Variations: Add more veggies: beans, peas, peppers, okra, broccoli, cauliflower... ! Add barley, oats, quinoa, wild or brown rice! :-)
○ Back to Top ○
Clean Comfort food made easy! This is an easy family meal that is quick to put together. Chelle's Recipe
Ingredients:
DIRECTIONS: Cook pasta & drain according to package directions (I like to use low-sodium chicken broth instead of, or along with, water to increase the flavor). Add cooked noodles to crockpot and mix well. Serve. Variations: White beans are an excellent addition to this soup, and you can substitute wild and/or brown rice, barley or other grain for the pasta.
○ Back to Top ○
Crockpot Chili Verde
Recipe
Ingredients:
Directions: ○ Back to Top ○
Crockpot BBQ Chicken
Recipe
Ingredients:
Directions: Serve!
○ Back to Top ○
Leftover Turkey
Burroladas
(burrito/enchilada) Chelle's Recipe for Turkey Burroladas
Ingredients:
Topping: 1/2 cup shredded cheddar Preheat oven to 350. Grease 9x13 pan (I use coconut oil). Mix all ingredients (except the tortillas) in a bowl. Divide into the 12 tortillas, wrap and place seam side down in pan. Mix together ingredients for the topping, then drizzle over the burritos. Sprinkle with a bit of cheddar if you like.
Bake
for 30 minutes, allow to cool for 10. Serve.
○ Back to Top ○
Cider Brined Turkey
Recipe
Ingredients:
○ Back to Top ○
Sausage Leek Cornbread
Stuffing
Recipe
○ Back to Top ○
Caramel Apple Pie - Treat Food!
Recipe
Here's a photo of my pie, it was a little messy (lol), but pretty darn close to the way it was supposed to look!
○ Back to Top ○
Pumpkin Muffins
with Cream Cheese Frosting
Recipe
FROSTING:
DIRECTIONS
FROSTING: Makes 12 full size muffins.
Nutrition Information is per muffin including frosting, (from NutritionData.com)
and is estimated.
○ Back to Top ○
Creamy Tarragon Chicken
Recipe
PREHEAT OVEN TO 375 degrees In a blender or food processor, pulse mince the garlic and tarragon. Heat a medium-size skillet on a medium-high flame/heat, with the remaining 1 1/2 tsp butter, and sauté the garlic and tarragon briefly. Add the stock (broth), sea-salt, and pepper. On high heat, bring liquid to a boil, covered. Reduce the heat and simmer 5 minutes. Using tongs, remove the chicken from the oven to the skillet. spoon the sauce over the chicken, cover and cook until the juices run clear when inserted with a fork, about 20 minutes. Baste occasionally. In a small bowl, combine yogurt and flour. Remove chicken to a serving platter and cover; or place in the oven to keep warm. Add 2 tbsp of the tarragon sauce to yogurt mixture and stir well. Add several more tbsp of sauce, stirring again. Using a whisk, add the yogurt mixture to skillet, blending well. Cook until the sauce bubbles and is hot, whisking constantly, about 1 or 2 more minutes. Pour the sauce over the chicken and sprinkle with parsley. Yield: 4 servings.
Nutrition Information (from NutritionData.com) is estimated. Click
here to view full data.
○ Back to Top ○
Spiderweb Nacho Spread -
(bean dip)
Recipe
Web Links: Tostitos Natural Blue and Tostitos Natural Yellow and
○ Back to Top ○
Coconut Chocolate Chip
Cookies
Recipe
1 cup sifted coconut
flour ○ Back to Top ○
Recipe Day BEFORE:
1 cup
whole wheat flour
Combine the night before ingredients until smooth. Cover with cling wrap
and leave on the counter over night.
DAY OF: On baking day,
pour the mixture (from the night before) into a large bowl.
Add in maple
syrup, oat meal, wheat germ, flax meal, semolina flour, poppy seeds,
sesame seeds and sunflower seeds.
Using a wooden spoon mix till smooth.
Add in instant yeast and whole wheat flour, mix till smooth.
Add in salt
and slowly add the bread flour. Add just enough till you are unable to
mix with the spoon.
Take some of the remaining bread flour and place it
on a flat surface. Only add enough flour till the dough is just slightly
tacky, but smooth and elastic. Knead for 8-10 minutes.
Place the dough
into a lightly oiled bowl. Cover with cling wrap and set a side till
double in bulk.
Just before the hour is up pour out the flax seeds,
oatmeal, sesame seeds and poppy seeds onto a cookie sheet.
In a small
bowl combine the egg white and 3 tbsp. of water, set aside.
Pour out the
dough and lightly deflate. Cut dough in half and shape into loaves.
Brush the tops of the dough with the egg wash.
Place a loaf onto the
seeds in the cookie sheet. Roll the dough through the seeds till all the
dough is covered.
Place into a greased loaf pan( 5x7 ). Cover the loaves
with cling wrap and allow to double in size.
Brush the tops of the bread
with the remaining egg wash, this will help to glue the seeds to the
dough.
Slash the top of the breads.
Bake in a 375 degree preheated oven
for 35-40 min. or when the center of loaves are 180-185 degrees.
Allow
to cool on a wire rack. Nutritional Info
○ Back to Top ○
Recipe
○ Back to Top ○
This was really, really good! Got a thumbs up from the whole family! :-)
Recipe
Ingredients: 1. Heat oven to 350 degrees. In a large skillet, heat olive oil, onion and garlic, sautéing until lightly browned [I skipped the skillet step]. Cut sausage into small cubes and set aside. 2. In a large mixing bowl, whisk egg whites for 1 1/2 to 2 minutes. Add cheese, sausage, spinach, sautéed onion (if using) and garlic, and salt & pepper (or sea salt & mrs dash). Coat a 9-inch glass pie dish with non-stick cooking spray and pour mixture into it. 3. Place dish in oven and bake 40-45 minutes or until center is no longer liquid.
NOTE:
Mine required a total cooking time of 70 minutes. I think my spinach
probably wasn't as well drained as it could have been so I had to
keep draining off "water" from the center of my quiche. However,
once it was fully cooked it was truly amazing! I served it with
steamed snow peas & cherry tomatoes (see
recipe).
○ Back to Top ○
Garlic & Herb Marinated Surf & Turf
Skewers
A
friend served these at a summer party and they were incredible!
Recipe
Ingredients:
○ Back to Top ○
Chicken Enchilasagna - Devin
Alexander (tweaked)
Chicken Enchilasagna
Directions Brown the ground bison (or lean beef), season with the 2 Mrs. Dash flavors. Drain meat then add the can of diced tomatoes. Don't drain it. Add the shredded chicken until the seasonings are well mixed. Set aside. Meanwhile, combine the enchilada sauces in a medium bowl and mix until well combined. Set aside. Mix the cheese, cilantro, olives, and chilies in a second medium bowl. Set aside. Cut or tear each tortilla into about 9 roughly even pieces. Spread 1 cup of the enchilada sauce in the bottom of a 9 X 13-inch glass or ceramic baking dish. Cover the sauce evenly with about a third of the tortilla pieces. Then sprinkle about half of the chicken & bison over them. Pour about 1 cup of the sauce evenly over that. Then sprinkle a third of the cheese mixture over that. Repeat layering with half of the remaining tortillas, the remaining chicken, 1 cup of sauce, then half of the remaining cheese mixture. Follow that with another layer of the tortillas, then the remaining sauce, then the remaining cheese mixture. Cover with foil and bake for 25 minutes. Remove the foil and bake for another 5 minutes. Then remove from the oven and let stand for 10 minutes. Serve immediately. Note: The original recipe, is half this amount and is made in an 8x8 pan. You can easily halve my recipe.
Nutrition Information:
Using
NutritionData.com, I got a rough estimate. The fat content, for
instance, will go up or down depending on the meat you use, and if
you increase the cheese. The carbs will go up or down depending on
how many tortillas you use. The protein will go up or down depending
on how much you use (super easy to increase it!). Sodium isn't
listed here, but you can reduce it by buying chicken and beef/bison
without sodium added (watch your labels), and purchasing ingredients
that are low in sodium.
○ Back to Top ○
"Fat Burning Cookie" from Oxygen
Magazine
Fat-Burning Cookie -
Oxygen
Magazine Sept. 2010, pg 80...
1. Preheat oven to 350° 2. Combine first 4 ingredients in a large bowl and blend with a fork. 3. In a separate bowl, combine next 5 ingredients and whisk together with a fork, or use an electric mixer or food processor. 4. Add wet ingredients to dry and mix with a fork. Mix in oats, chocolate chips, and walnuts. 5. Drop by teaspoonfulls onto an oiled or parchment-paper-lined baking sheet. Bake 12 minutes until the cookies are slightly brown on top.
Nutrients per serving
(2 cookies - see note above):
○ Back to Top ○
Steamer Bag Veggies - Super Easy!
Here are several I do...
Steamed Snow Peas &
Tomatoes...
Makes 1
serving Clean veggies & toss them in the steamer bag. Add 1 tsp coconut oil and a dash of Mrs Dash Garlic & Herb. Seal the bag. When you're ready to enjoy, microwave on high for 1 to 1 1/2 minutes. Allow to rest for one minute (don't open the bag), then dump onto a plate or into a bowl! It's that easy!
1 to 2
cups fresh broccoli florets Microwave on high according to the package directions. Let rest one minute (don't open the bag). Open bag & dump onto a plate. Done! Squirt some fresh lemon juice over the veggies for added flavor.
1 to 2
cups fresh caulflower florets Microwave on high according to the package directions. Let rest one minute (don't open the bag). Open bag & dump onto a plate. Done! Squirt some fresh lemon juice over the veggies for added flavor.
1 small
zucchini - sliced to desired thickness (I do 1/4") Microwave on high according to the package directions. Let rest one minute (don't open the bag). Open bag & dump onto a plate. Done! Squirt some fresh lemon juice over the veggies for added flavor.
1 Ear
of Corn
Clean
and trim one ear of corn and place in bag. Add coconut oil or
butter. Seal. Microwave on high for 2-3 minutes. Allow to rest for
one minute (don't open the bag). Check for doneness and either serve
or return to microwave for additional time. Corn is done when
you pierce a kernel with a sharp knife and it "bursts" or squirts. Steamed Artichoke... Makes 1 serving 1 Artichoke Clean and trim and place in bag. Seal. Microwave on high for 3-5 minutes. Allow to rest for one minute (don't open the bag). Check for doneness and either serve or return to microwave for additional time. Artichoke is done when inner leaves pull away (open) easily when prodded by a fork.
1
handful of asparagus spears Clean and trim and place in bag. Add Mrs. Dash. Seal. Microwave on high per instructions on bag. Allow to rest for one minute (don't open the bag). Check for doneness and either serve or return to microwave for additional time. Squirt some fresh lemon juice over the veggies for added flavor.
1
Large Portabello Mushroom cap Clean and trim the mushroom cap. Place spinach leaves as the bottom layer inside the cap. Top with pico de gallo, then feta. Place in bag and seal. Microwave on high for 2 1/2 minutes. Allow to rest for one minute (don't open the bag). Serve!
○ Back to Top ○
Tomato & Cucumber Salad
My Recipe...
Makes 1
serving Chop the tomato & cucumber, place in a small bowl and drizzle the oils over them. Sprinkle with Sea-Salt & Mrs Dash. Toss. That's it! Super Easy! Nutrition per serving: 147 calories, 1 g protein, 4 g carbohydrates, 14 g fat (7 g saturated - this is the coconut oil and it's GOOD sat. fat), 0 mg cholesterol, 1 g fiber, 120 mg sodium
○ Back to Top ○
Bacon Wrapped Tilapia - Clean!
The Recipe...
Makes 2
servings
○ Back to Top ○
Bacon Cheeseburger - Clean!
The Recipe... (makes 1 - multiply recipe for required number of servings)
4-ounces
96% lean ground beef (I used bison)
Preheat grill to high (I used my Foreman grill). In a small bowl, mix the beef, bacon and onion until well combined. Shape the beef into a patty about 1/2 larger in diameter than the bun. Lightly sprinkle both sides of the patty with sea-salt. Grill burger 1-2 minutes per side for med-rare, or until desired doneness is reached. (don't smash the burger with a spatula). Just before the burger is done, place the bun halves, insides face down, on a top grill rack or away from open flame to toast them. Add the cheese atop the patty to melt (15-30 seconds).
Place the
toasted bun bottom on a plate. Add the burger patty, the lettuce,
and the tomato slices. Spread the ketchup or barbecue sauce over the
inside of the bun top and flip it atop the burger. Serve
immediately. NUTRITIONAL INFORMATION: Each sandwich (per recipe) has about 351 calories; 36 g protein; 29 g carbs; 111 g fat; 80 mg cholesterol; 4 g fiber, 745 mg sodium. These numbers will change depending on the bun you use, your choice of ketchup or bbq sauce, etc. My bacon bits were lower in sodium, as was my bbq sauce. (see my nutritional data below)
Here's
the nutritional data for just the burger, no bun: ○ Back to Top ○
Ahi Steak Sandwich:
The Recipe... (makes 1)
2
4-ounce Sushi or Sashimi Grade Ahi Tuna steak (should be beautifully
pink and not smell fishy) Have all ingredients ready, because the tuna cooks fast and you don't want it sitting around while you're putting your sandwich together :-)
Prepare
the wasabi, (mine is a powder you mix with hot water and requires a
5 min. rest, so check the directions on yours). Combine with the
mayo and set aside. Heat a small non-stick skillet on high heat until hot, but not smoking. Oil the tuna on both sides and sprinkle with fresh pepper & sea salt. Add tuna steak to the pan and sear - about 30 seconds to a minute on each side. Ahi should be RARE in the middle... if look at my photo, you'll see that I actually overcooked mine (still tasty, though). Spread 1/2 the wasabi-mayo on each bun top. Place lettuce and tomato on bottom bun. Top with Ahi, then avocado (if using), and top bun. Serve immediately. NUTRITIONAL INFORMATION: Each sandwich (without avocado) has about 298 calories; 32 g protein; 27 g carbs; 7 g fat; 0 mg cholesterol; 4 g fiber, 395 mg sodium. These numbers will change depending on the bun you use, your choice of mayonnaise, and whether or not you add the avocado. ○ Back to Top ○
Breakfast Sandwich - Egg & Turkey:
My Recipe...
1 Whole
Wheat english muffin (or ezekiel, bagel thin or sandwich thin)
Spray a
small egg pan (or any pan, I use a little cheapy One-Egg Pan - $4 at
Walmart) with coconut or olive oil. When hot, add egg and sprinkle
lightly with Mrs Dash Garlic & Herb. While cooking, toast the
english muffin. When the egg is almost cooked through, flip it over
(unless your scrambling). Place the cheese on the bottom muffin
slice, top with hot egg, then the deli meat, tomato and baby
spinach. Nutritional Information: This is based on using a Thomas' Light Multi Grain English Muffin and Applegate Farms Organic Roasted Turkey Breast and Tillamook Medium Cheddar Cheese. The sodium count can be reduced by changing either the muffin or the cheese to a low-sodium variety.
Nutrition
Ratio:
Breakfast Sandwich - Egg Only: My Recipe...
1 Whole
Wheat english muffin (or ezekiel, bagel thin or sandwich thin)
Spray a
small egg pan (or any pan, I use a little cheapy One-Egg Pan - $4 at
Walmart) with coconut or olive oil. When hot, add egg and sprinkle
lightly with Mrs Dash Garlic & Herb. While cooking, toast the
english muffin. When the egg is almost cooked through, flip it over
(unless your scrambling). Place the cheese on the bottom muffin
slice, top with hot egg, tomato and baby
spinach.
Nutrition
Ratio:
○ Back to Top ○
My Recipe...
1 Steamer
Bag (either Ziploc or Glad) Add egg product and chopped veggies to steamer bag (and meat if using). Microwave for 4 minutes. Let stand 1 minute. If still runny, nuke for another minute or two. Put spinach on plate. Dump omelet out of bag on top of the spinach. Top with black beans and microwave for 30 seconds to a minute... just long enough to heat up the beans. The spinach will have wilted nicely from the heat of the omelet. Sprinkle salsa and feta over the top and enjoy!
○ Back to Top ○
Healthy Pizza: My Recipe...
1
Ready-Made Whole Wheat Pizza Crust (see products below) Spread sauce on crust. Top with 1/4 to 1/2 of the Mozzarella Cheese. Add meat toppings, then veggie toppings. Sprinkle Mrs. Dash and also remaining cheese(s) over the top. Don't be afraid to load up this pizza! I pile on tons of chopped veggies & meat! Bake at 450 degrees on pizza or cookie sheet for 8-12 minutes or until toppings are browned and cheese melted. Remove from Oven and let sit for about 3 minutes before slicing. Below are some products I use in this recipe. Click photo to view nutritional information for each. ○ Back to Top ○
This started as a "my meal" while everyone else had lasagna. Bill took a bite and loved it! It's now a whole-family meal! -- A note about Spaghetti Squash: While most everyone will suggest it as a replacement for pasta... it is NOTHING like pasta. But it is very tasty. My Recipe...
1
Spaghetti Squash Cut spaghetti squash in half, lengthwise, place in a microwave safe bowl open side down and cover with plastic wrap. Microwave for 7-10 minutes (the longer you cook it the softer - more pasta-like - the "strands" become). Allow to cool slightly (so you don't burn yourself when you touch it). Chop Broccoli and Cauliflower. Place in Large Ziploc Steamer Bag and add some Mrs. Dash Garlic and Herb (or whichever flavor you prefer). Microwave for the time specified on bag. Reheat shredded chicken. Shred the squash with a fork (forming spaghetti-like strands). Scoop into a bowl. Add the broccoli and cauliflower. Add Chicken. Add salsa and mix it up. Top with a sprinkling of cheese. Below are some products I used in this recipe. Click photo to view nutritional information for each. You can find additional Spaghetti Squash recipes here. ○ Back to Top ○
This is a great meal that the whole family enjoys! When I'm being carb-conscious at night, I make this for the family, then I do a spaghetti squash for me (replacing the pasta with the squash, but using the same meat & sauce). My Recipe...
1 pound
extra lean ground beef (at least 96% lean) -
99% Lean Ground Turkey or other
lean meat (or clean meat substitute) of choice can be substituted.
Boil the
pasta according to directions & drain. (tip - I've found that if
I cook whole wheat pasta a bit longer than called for, it's softer
and more like "regular" pasta, but corn or quinoa pasta should NOT
be overcooked!) Serve with a salad made of 1/2 baby spinach and 1/2 lettuce of choice plus whatever veggies you want to throw on there. Instead of dressing, squeeze a lemon over your salad. MAKE YOUR OWN SAUCE - I toss 1 lg can of Muir Glen Organic Fire Roasted Crushed Tomatoes with 1 regular size can of Muir Glen Organic No Salt Added Tomato Sauce, then add sea-salt, Mrs Dash Tomato & Basil, olive oil, fresh garlic, and whatever else I feel like. :-) I'd love to eventually make my own sauce from scratch, but I'm not there yet. side by side comparison of the dish prepared with spaghetti and as spaghetti squash: ○ Back to Top ○
This is a great meal that the whole family enjoys! My Recipe... METHOD 1
1 30oz
Jar Williams-Sonoma Chili Verde Starter (only sold in stores, not
online. Can substitute any green chili salsa of choice) Place Chicken Breasts in crock pot. Add jar of Chili Verde Starter (or green chili sauce/salsa). Cook on High for 4 hours, then low for 2 - 4 more hours. Do not drain. Shred chicken with two forks and return to the "juice".
8 Corn
Tortillas Bake corn tortillas on cookie sheet (350 degrees) until crispy (but not burnt). Layer: corn tortilla, lettuce/cabbage, shredded chicken. Top with onion, tomato, cheese or whatnot. For more fiber, you can add a tablespoon of Rosarita No-Fat Refried Black Beans, or similar. METHOD 2 In my Sunday food prep, I crockpot a bunch of chicken breasts in low-sodium broth, then shred the chicken, drain the broth, and add a jar of green chili salsa. This is then stored in the fridge for use in wraps, tostadas, tacos, salads or whatever. Sometimes I simply shred the chicken then store it in the "crockpot juice" for use as needed. In this case, I simply drain the "juice", then add the salsa and microwave it to heat it through. Voila! Dinner is ready!
Below are some products I used in this recipe. Click photo to view nutritional information for each. ○ Back to Top ○
My Recipe...
1 Whole
Wheat Low-Carb Tortilla Spread dijon on tortilla, fill with spinach and chicken. Wrap.
○ Back to Top ○
My Recipe...
1 cup
fresh blueberries Make waffle batter according to Bisquick package, adding in 2 scoops of protein powder. Once mixed, add the berries and stir until combined. Make waffles! ○ Back to Top ○
My Recipe...
1 - 2 cup
fresh beets (I mix golden & red, or whatever my supermarket has) Wash beets. Place a large piece of parchment paper on the counter. Add broth to crockpot. Put beets in center of parchment, drizzle with olive oil and sprinkle on pepper & sea salt. Bringing the sides of the paper together, twist the top and place the bundle in the crockpot (no, the paper won't dissolve in the broth - no worries). Cook on high for 4-5 hours or until the beets are tender and easily pierced. Allow to cool, then with a sharp knife, peel the skins off the beets (they should literally peel right off, like a boiled potato). Either serve, or place in containers for later meals. ○ Back to Top ○
My Recipe... (also
see my own homemade recipe here)
2 lb Lean
Ground Buffalo (I get mine at whole foods from the butcher counter,
but Frys and other stores carry it in 1lb pkgs in the meat dept.)
Brown the buffalo and drain (I add about 2 tsp dehydrated onion and 1tsp Mrs Dash Garlic & Herb to my meat as I'm cooking it). Place cooked meat in crockpot. Add the contents of 3 cans of beans (drained and rinsed), and 1 jar of chili starter plus 1 cup water. Stir together, and cook on high for 2 hours, or low for 5-7 hours. As is typical with chili, the longer it simmers, the better it tastes, but this chili is wonderful whether it's cooked for an hour or eight! And the leftovers are terrific on top of a baked potato!
Note: Buffalo is naturally lower in fat
than beef, without losing any of the flavor. ○ Back to Top ○
My Recipe...
1 lb Lean
Ground Buffalo or Beef Brown the meat, season with salt/pepper (light on the salt) or Mrs Dash and dehydrated onion if desired. Drain. Chop the mushrooms & zucchini really fine. Chop onions. Add the veggies to the meat & mix. Add brown rice and mix together. You can add the feta into this mixture or use it to top everything off. Stuff the peppers with the meat mixture. Place one pepper in each steamer bag. When ready to cook, pop steamer bag in microwave and nuke for 3-4 minutes. Let rest 1 minute. Voila! ○ Back to Top ○
Tabitha Citro's Recipe...
1 lb
Extra Lean Ground Turkey (or Buffalo, Chicken or Beef - as long as
it's EXTRA LEAN) Add 2 bags of Success Brown Rice (boil-in-bags) to water plus 1-cup low sodium chicken broth. Cook according to directions on box.
Brown the
meat, season with sea-salt/pepper or Mrs Dash and dehydrated onion
if desired. Drain and set aside.
Makes
6 servings. ○ Back to Top ○
Chipotle Flank Steak Tacos With Pineapple Salsa
·
12 soft corn tortillas Preparation 1. Preheat grill to high. Stack tortillas and wrap in heavy-duty foil. Combine oil, 1 teaspoon chipotle powder, and 1/2 teaspoon salt in a small dish. Rub mixture into both sides of steak. Place the tortilla stack on the coolest part of the grill or upper warming rack, if possible, and heat, flipping once, until warmed through and very pliable. 2. Meanwhile, grill the steak for 4 to 6 minutes per side for medium, or until desired doneness. Grill pineapple rings until moderately charred, 1 to 2 minutes per side. Remove the tortillas, steak, and pineapple from the grill. Let the steak rest for at least 5 minutes before slicing very thinly crosswise into strips. 3. Meanwhile, dice the pineapple and transfer to a medium bowl. Add bell pepper, onion, cilantro, vinegar, the remaining pinch of chipotle powder, and the remaining 1/2 teaspoon salt; toss to combine. Serve the sliced steak in the warm tortillas with the pineapple salsa. Makes 6 servings. ○ Back to Top ○
My Recipe...
1 package
Buffalo Medallion (2 medallions)
Marinate
Buffalo steaks in raspberry chipotle sauce for 30 min. Lay a tortilla on your cutting board. Drizzle with spicy brown mustard. Sprinkle coleslaw mix over the tortilla. Place a few cucumber, artichoke bottom and red pepper sticks down the center of the tortilla. Sprinkle 1-2 tblsp sprouted seeds over the tortilla. Add 4-6 slices of buffalo, then sprinkle with about 1 tblsp of feta. Roll up your wrap, cut in half and serve. I make a few ahead of time and put them in ziploc sandwich bags to toss in my cooler.
○ Back to Top ○
My Recipe...
2 pounds
ground LEAN Buffalo (I buy mine from the meat counter at Whole Foods
because it's lower in fat and Zero Sodium, unlike the pre-packaged
ground buffalo) Season & brown the bison. Bake the tortillas until crispy, or heat up your packaged taco/tostada shells. Layer beans, bison, and veggies into your taco shell or tostada. I love the nutty flavor the seeds give it. :-) ○ Back to Top ○
My Recipe...
1 Chicken
breast, grilled (from Sunday's food prep, marinated before cooking
in Bronco Bob's Roasted Raspberry Chipotle Sauce). Slice and/or dice
the chicken, place in a baggie (you can substitute any of the meats
you prepared on Sunday for this salad, or you can add a handful of
cooked shrimp - I buy the bag of frozen cooked med. size shrimp,
then pull out 8 and place in a baggie, toss it in my cooler, and if
it's not defrosted by lunch, just run cold water through the bag for
a minute or two and they'll be ready).
Toss all
bags in your cooler. ○ Back to Top ○
My Recipe...
2 Hard
Boiled Eggs
Slice
eggs.
To add
more protein, I add a couple slices of grilled pork or buffalo (from
Sunday's food prep). ○ Back to Top ○
My Recipe... ready in 10 minutes!!
1 Arnold's
Whole Wheat sandwich rounds (avail at Safeway & other grocery stores)
Preheat
oven to 425. Open sandwich thin. Place both halves on a foil
lined baking sheet. Bake in oven for 5 minutes. Allow to cool and enjoy! ○ Back to Top ○
My Recipe... ready in 5 minutes!!
2 individual
cups of Egg Beaters (or the equivalent of 4 eggs if you're using the
large container)
Microwave the
Kashi for 60 seconds (remember to tear open the corner so it doesn't
blow up) ○ Back to Top ○
My Recipe...
1 flank steak
Cook on high
5 hours, then reduce to low for another 2-3 hours. Do not drain.
Meal: You can use meat to make wraps, pitas, or to top a salad. I put it on top of shredded cabbage, chopped zucchini, red & yellow peppers, mushrooms, green onion, sprouted sunflower seeds... whatever veggies are on hand. Then I sprinkle either reduced fat feta or crumbled bleu cheese over the top (everyone else in the family uses cheddar). You can also throw it all on top of a baked potato if you like, instead of making a wrap, pita or salad. ○ Back to Top ○
My Recipe...
1 small
Buffalo steak, grilled & sliced (I grill it on my Foreman Grill, with
Raspberry Chipotle sauce... see below) [This is part of the food prep I
do on Sundays so the meat is already grilled, sliced and packaged in the
fridge for when I need it] Layer spinach & cabbage, then veggies. Sprinkle on the feta & seeds, add tomatoes. Squeeze lemon over everything, then top with the sliced buffalo. Enjoy!
○ Back to Top ○
My Recipe...
1 serving
protein (either grilled pork tenderloin or a chicken breast or whatever
I've prepped)
This is part of my Keep it Simple routine. Protein: Sunday, when I food prep, I place individual portions in baggies. Example: 1 grilled or crockpot chicken breast. Veggie: Sunday, I chop veggies and place them in individual Ziploc steamer bags & add a sprinkle of Mrs. Dash. Carb: Grab a container of Annie Chun's Rice Express. One serving is half the container. I know it doesn't look like much, but it is really filling. Fat: 1/2 an avocado or a stick of string cheese, or a handful of almonds. That's it! Super easy! Just toss a protein baggie, a steamer bag and a container of rice in the cooler and there it is! At lunchtime, toss the veggies in (usually 3.5min), then toss in the rice (1min), then the protein (1min if you need to, I generally don't heat up my protein). Dump it all on a plate and in less than 7minutes your lunch is ready. :-)
○ Back to Top ○
My Recipe...
1 packet
instant oatmeal (plain, and check for low sodium) or 1/2 cup dry
quick oats This is also part of my Keep it Simple routine. Stir ingredients together in a bowl. Add water, stir again (add more water if needed). Microwave for 1 minute. Add a half cup of fresh berries if you like. Stir. This recipe can be prepped ahead of time, see the Food Plan page for details.
Places to buy Beverly's protein: http://www.bodybuilding.com/store/bev/ult.html http://store.beverlyinternational.com/cgi-bin/commerce.exe?preadd=action&key=21 http://www.tigerfitness.com/Ultimate-Muscle-Protein-p/bev-19.htm?gclid=CN2M3b6Vu54CFREhDQodQnJ0lA
○ Back to Top ○
My Recipe...
1 beef roast
(as lean as possible, cut off any extra fat) Place meat in crockpot, add 1 bottle of sauce and cook on high for 4 hours. Drain "juice", add 1/2 bottle of sauce, and cook on low for another 1-2 hours until meat reaches desired tenderness. Remove from crockpot, shred or chunk, and add remaining sauce. Serve with Sweet Potato Oven Fries and a green salad.
○ Back to Top ○
The Eat Clean Diet for Family & Kids by Tosca Reno has a recipe for clean sweet potato fries (pg272). It's wonderful! Recipe...
2 large size
sweet potatoes, skin on, well scrubbed (I used one yam and one sweet
potato, so my fries were orange and white) Preheat oven to 450F/232C. Cut the potatoes into finger-like wedges. Place them in a bowl and toss with the rest of the ingredients. Line a cookie sheet with parchment paper. Place the sweet potato wedges on the sheet so the pieces remain separate from each other. Bake for 30 minutes or until wedges develop a golden color.
○ Back to Top ○ Women's Health Magazine offered this terrific recipe for homemade in a hurry tomato soup in the Jan/Feb 2010 issue. It's super low in sodium (just 43mg!!), so feel free to toss in some sea salt and cracked pepper to spice it up a bit. It was a bit bland, for our taste, so we did add some sea salt. The texture was wonderful, very creamy and smooth. I used a handheld mixer to puree it right in the pan. This recipe got a thumbs-up all around in my house. Further adjustment... 3/16/10... I replaced the thyme with fresh basil, and the no-salt added diced tomatoes with Muir Glen Organic Fire Roasted diced tomatoes. The results were incredible! No additional sea-salt was needed in the recipe, and my hubby didn't add salt himself! Victory! :-)
Recipe...
by Kerry
Neville, R.D. ○ Back to Top ○ Clean Eating Magazine had a recipe for won-ton chips made with homemade won ton wrappers. (wrapper recipe here: PDF). Since I don't have time to make my own won-tons, I use store bought wrappers instead. I've made these several times and always get asked for the recipe. They're really good with salsa, hummus, even "refried" black beans, or just plain! My Recipe... Preheat oven to 350.
1 package
small won-ton wrappers (usually in the organic refrigerated section) Line a cookie sheet with parchment paper. Cut wrappers into desired shapes. I usually just do triangles but you can get fancy. Lightly spray parchment w/ olive oil, lay wrappers on paper, and lightly mist with the oil. Sprinkle seasonings. Bake until golden & crispy. To store, I just place them in a brown paper bag and they are usually good for a few days to a week. ○ Back to Top ○
Consumer Reports Food & Fitness Magazine had a recipe for Asian-Style Quinoa Salad with Chili-Orange Dressing. I made it and fell in love! They call for you to eat it cold, but I heat mine up. Oh so yummy! The Recipe... Pg. 56
Chili-Orange Dressing:
Quinoa
Salad 1. Make the dressing: In a small bowl, whisk together orange zest & juice, soy sauce, honey, sesame oil, chili sauce or pepper flakes and pepper, to taste. Set aside. 2. To cook the quinoa, bring 2 cups of water (I used low-sodium nonfat chicken broth) to boil in a pot. Add quinoa in a steady stream, stirring to prevent lumps from forming, and return to a boil. Reduce heat to low. Cover and simmer until tender, about 15 minutes. Look for a white line around the seeds -- it's the germ, and when it bursts, the grain is cooked. If water remains in the pot, remove lid and stir occasionally until all the liquid evaporates, being careful not to overcook. You want the quinoa to retain a bit of pleasant chewiness. Remove from heat and let stand, covered, for 5 minutes. Fluff with a fork and let cool. 3. In a serving bowl, combine quinoa, water chestnuts, red pepper, snow peas, and green onions. Add dressing and toss until combined. Chill for about an hour.
Below is the nutritional information, as closely as I can calculate
it. This is per serving, based on the stated 6 servings per batch.
This is a bit high, as I consider a serving to be 1/2 cup (or about
136 g) . This was figured with
www.NutritionData.com ○ Back to Top ○
Women's Health Magazine, Jan/Feb 2010 had this recipe (view page). It was plenty for 3 of us, and then I looked at the recipe and saw it was a serving of 1! Way too much food for one person. The recipe is perfect for 2 with leftovers, or 3 with no leftovers. Also, I prepped the brown rice, veggies & meat (sliced it and put it in a baggie) on Sunday, then we had this on Monday night. It was super fast to put together and very tasty. The Recipe... Pg. 74
2 tsp peanut
oil Combine peanut oil and red pepper flakes in a hot skillet. Add chicken strips and cook for 2-3 minutes, stirring frequently. Add all remaining ingredients to the pan and cook for another 2-3 minutes, stirring often. Serve over brown rice. Makes 1 serving. Per serving: 428 cal, 18 g fat (3g sat), 20 g carbs, 505 mg sodium, 7 g fiber, 48 g protein. ○ Back to Top ○
IBS Cookbook for Dummies by Carolyn Dean, MD ND & L. Christine Wheeler, MA had this recipe on page 218... but it is taken from Raman Prasad and his book Recipes for the Specific Carbohydrate Diet. This is a safe recipe for those with IBS, Colitis, Crohns... And it's yummy :-) I got my pineapple at Whole Foods Market, and knowing my klutziness, I had them cut it for me. The cake itself is pretty thin, but the flavor of the pineapple is just amazing! The Recipe... Pg. 218
Prep time 15
min
2 cups almond
flour, or more as needed for consistency 1. Preheat the oven to 350 degrees. Grease a 9x12 baking dish 2. Mix the almond flour, eggs, butter, honey, vanilla, and cinnamon by hand or with a hand mixer until smooth. Add more almond flour if necessary to make sure the batter isn't too thin. 3. Layer the pineapple slices on the bottom of the baking dish. Pour in the cake batter and spread it evenly in the pan. Bake the cake for 30-40 minutes, or until a toothpick inserted into the center comes out clean. Per serving: calories 180; fat 12.1g (saturated 2.8 g); cholesterol 50mg; sodium 36mg; carbohydrate 20.9 g (fiber 2.4g); protein 5.7g; sugar 10.9g ○ Back to Top ○
Crockpot Apricot Jam / Preserves
The book The Gourmet Slow Cooker, Volume II by Lynn Alley offers this recipe, and it's fabulous! On a clean eating addenda, I used organic, unsweetened apricots... these are (to my surprise, lol) brown, as there are no sulfites to maintain the color, so my preserves are also brown instead of that lovely orange, but the taste is incredible. These are worth making! The Recipe... Pg. 70 Makes about 1 cup
8 ounces
dried apricots Combine the apricots, juice and zest in a 2 1/2 or 3-quart slow cooker. Cover and cook on low for about 4 hours, until thick and spoonable. Preserves will thicken as they cool, but if they need to thicken further, remove the lid, increase the heat to high, and cook for another hour. Refrigerate and use within one week. ○ Back to Top ○
Almond Butter
Chocolate Chip Cookies - Sometimes you've just got to have a cookie. Wouldn't it be great to have one that's low in sugar, flour-free, and tastes amazing?? Here it is! The March/April 2010 issue of Clean Eating magazine offers this wonderful recipe, plus another (see below) for chocolate cookies. No one will believe these are "clean"! I used fresh unsalted almond butter, and there are so many great nut-butters available that I plan on trying them all! :-) NOTE: If you haven't already subscribed, this is a magazine worth getting! And you can buy back issues! :-) Check out their website for info... http://www.cleaneatingmag.com The Recipe... Pg. 98 Makes about 24 small cookies
1-Cup
Unsalted almond butter, stirred well
Instructions:
TWO: Drop dough by rounded tablespoonfuls onto parchment-lined baking sheets. Bake for 10-12 minutes or until lightly browned. Let cool on baking sheets for 5 minutes. Remove to a wire rack and let cool for 15 minutes more.
Nutrients per cookie:
○ Back to Top ○
Chocolaty Goodness Cookies
- These incredible, chocolaty, fudgey cookies must be tasted to be believed! No flour! special note: Arrowroot powder is found in the spice section of your grocery store. The Recipe... click on photo to view recipe on their website. Makes about 24 small cookies
Olive Oil
cooking spray Instructions:
NUTRIENTS per cookie:
LINK: http://www.cleaneatingmag.com/recipes/ce12_chocolatecookies.html ○ Back to Top ○
My family
LOVES Taco Salad, so I found a way to make it clean :-) special note: Bill and the kids use 2% cheddar and light sour cream and tortilla chips, I use reduced fat feta and fat-free cottage cheese and I skip the chips. My Recipe...
2 lb's
ground beef or bison or 97-99% lean turkey (to reduce fat further,
after cooking, rinse meat in a sieve/colander with warm water, then
return to pan, add more seasoning, and re-heat) Brown ground meat & season. After draining (and rinsing to remove fat), add refried black beans and black beans (rinsed), stir together and heat. Set out everything else, and allow everyone to "build" their salads. Begin with lettuce/salad, and layer from there! This recipe is high in fiber and protein plus has all the veggies & healthy fats to create a very filling and clean meal :-) Bill and the kids start with a layer of tortilla chips, but I skip them.
Photo of
Bill's salad
○ Back to Top ○
I was trying to find a cheaper way to make my Buffalo Chili, and this was the result! :-) special note: Bill and the kids use 2% cheddar and light sour cream to top it, I use lowfat cottage cheese. Also, because Bill doesn't like "real" onions, I use dehydrated or shallots, but you can easily substitute the real thing. My Recipe... Makes 11 cups of chili.
2 lb's
ground beef or bison
Nutritional Information (this is for the recipe made with
Beef): ○ Back to Top ○
The gals on the Tosca Reno Clean Eating forum turned me onto this terrific way to make popcorn. My whole family (except Bill who doesn't like popcorn) LOVES the movie theatre style so-bad-for-you popcorn. This has replaced it! The kids love this, Bill even enjoys it! It's my favorite late night gotta-have-something treat! Worried about the fat in the coconut oil? Don't! It's good for you! The Recipe...
1/3 cup
popcorn kernels (check the label, the only ingredient should be
corn)
Put the
popcorn in a brown paper lunch bag. Fold the top over once or twice.
Place in the microwave and nuke just until you hear the popping slow
(don't wait for it to stop, it'll scorch - yuck!).
Variations!
After adding the coconut (or olive oil, if you prefer... you can
even use real butter) Note... popcorn was contains high levels of healthy plant antioxidants called polyphenols. This is GOOD! :-) You can google for news about this discovery, or read about it here.
○ Back to Top ○
This is from
Cooking Light Magazine. The Recipe...
Prep
Time: 40 minutes
Ingredients
This recipe can be found on the web at: http://find.myrecipes.com/recipes/recipefinder.dyn?action=displayRecipe&recipe_id=1963964
○ Back to Top ○
This is from
Eat Clean Cookbook by Tosca Reno. The Recipe...
2 cups dry Great Northern Beans 1. 1. Soak beans overnight in plenty of water.
2.
2.
The next day, discard the water and rinse beans. Add fresh water. Bring
to a boil. 3. 3. Drain beans, reserving 2 cups of the cooking liquid.
4.
4.
Place half the beans in the crockpot. Sprinkle half the onion over the
beans. 5. 5. Mix 1 cup of the cooking liquid with maple syrup and add to beans.
6.
6.
Put mustard, ginger, salt, thyme and molasses in a small bowl. 7. 7. Cook, covered for several hours. Remove the lid and cook for 30 minutes more. Serve hot.
○ Back to Top ○
This is from www.ElanasPantry.com, one of my favorite recipe sources. An added benefit is that these wonderful muffins are both gluten free and diabetic friendly! I made several substitutions, as noted below the recipe. The Recipe...
¼ cup coconut flour 1. In a large bowl, combine coconut flour, salt and baking soda 2. In a smaller bowl, blend together eggs, agave and oil 3. Blend wet ingredients into dry, then blend in rosemary and lemon zest 4. Scoop batter 1 tablespoon at a time into greased mini muffin tins 5. Bake at 350° for 7-8 minutes 6. Cool then remove from muffin tins and serve
Chelle’s notes… · Celtic Sea Salt: I don’t purchase Celtic Sea Salt because it’s very expensive. Instead I buy the best available for the lowest price. Any fine-ground sea-salt will do. · Agave Nectar: Because of the contradicting data on the benefits of agave (regarding the glycemic index) I often use honey instead (which, if local, offers the additional benefit of improving your immunity to local allergens). Agave and Honey can be used interchangeably. By using Agave or Honey, these muffins are considered Sugar-Free. · Grapeseed Oil: I am currently replacing my cooking oils with coconut oil for the health benefits it offers. Coconut oil keeps these muffins very moist. ○ Back to Top ○
This is from www.TheNourishingGourmet.com. I substituted honey for the coconut/palm sugar since it is not readily available to me. These are wonderful, but must be kept chilled to maintain solidity. At room temperature, this makes an incredible frosting!! One thing I do is to take the un-set fudge and put a bit in mini muffin liners and chill. It's the perfect size for a decadent dark chocolate treat! :-) The Recipe.
Ingredients
Directions 2-In a food processor using the regular blade, add the melted coconut oil and the rest of the ingredients and mix until well combined. 3-Place enough plastic wrap or parchment paper in a loaf pan to cover the bottom and sides of the pan. Scrape your fudge “dough” into the loaf pan, and fold the plastic wrap or parchment paper over the top of the fudge. Gently press down, to even out the thickness of the fudge (you want it to be about 1/2 inch thick, it will cover probably about 1/2 of the bottom of your loaf pan). Take out the fudge, carefully wrapped up, and place in the freezer or refrigerator until it has set up. In the freezer it only takes about 20- to 30 minutes. 4-Cut into small squares, and enjoy!
Nutritional Information:
I've started using an 8x8 pyrex (instead of a loaf pan), then cut my
tray into 5 rows of 5 pieces = 25 pieces. This data is per piece.
○ Back to Top ○
Peanut Butter Coconut
Oil Fudge This is from a blog I discovered online. I substituted honey for the coconut/palm sugar since it is not readily available to me. These are wonderful, but must be kept chilled to maintain solidity. At room temperature, this makes an incredible frosting!! One thing I do is to take the un-set fudge and put a bit in mini muffin liners and chill. It's the perfect size for a decadent dark chocolate treat! :-) The Recipe.
1/2 cup butter (see note below)
Nutritional Information:
I cut my tray into 10 rows of 5 = 50 pieces. Nutrition info is per piece,
and based on my substitutions... no butter, full cup of oil.
○ Back to Top ○ This is from www.TheNourishingGourmet.com. The Recipe. 1 cup coconut butter
1
teaspoon coconut oil
Add coconut butter to food processor and chop up into fine chunks. Melt coconut oil (not too hot) and add to food processor while spinning. Slowly add honey and extract/rind. Taste as you go to achieve desired sweetness. Place waxed paper on cookie sheet. Scoop mixture onto paper and spread thinly (1/3 -1/2 inch) and put pan in refrigerator to chill. Take out and cut into small 1/2 inch squares. Peel off paper and store in airtight container in the refrigerator. *Original Recipe source: Cooking to Heal.
○ Back to Top ○
This is from a great online source for coconut oil recipes. The Recipe. Preparation Time: 5 minutes
Mix all ingredients together in a small bowl until a sticky dough-like consistency has formed. Add a little more protein powder if needed. Roll into small balls and drizzle with melted chocolate. Refrigerate or freeze until firm.
○ Back to Top ○ This is from a great online source for coconut oil recipes. The Recipe.
makes approx.
45 truffles
Pour the heavy cream into a glass bowl set over a pot of simmering water. Turn heat off as soon as you place the bowl on top. Stir in the chocolate and coconut oil in with a rubber spatula. Once the chocolate has melted, remove bowl from the pot and stir in the balsamic vinegar. Refrigerate the chocolate for 1 hour. Remove from the refrigerator and let sit at room temperature for 1-2 hours, until firm but moldable. Place coatings of choice into shallow bowls, starting out with about 1/4 cup. Using a teaspoon scoop out measuring teaspoon sized balls of the chocolate. Use your hands to form into tiny balls. Drop the balls into the coatings of choice and roll until coated. If the truffles are too soft after forming, refrigerate for about 15 minutes, or until a little firmer. To store, refrigerate overnight and store at room temperature. The truffles will keep for about 1 day at room temperature, or several days in the refrigerator, or weeks/months in the freezer.
○ Back to Top ○
These incredible brownies from http://www.elanaspantry.com/brownies/ are both gluten free and sugar-free! No one will believe it! Truly the best brownies! For an additional treat, use one of the coconut oil fudge recipes (at room temperature) as a frosting! Wow!!! The Recipe.
Chocolate Chip Brownies In a large bowl, blend almond butter until smooth with a hand blender Blend in eggs, then blend in agave and vanilla Blend in cocoa, salt and baking soda, then fold in chocolate chips Grease a 9 x 13 pyrex baking dish Pour batter into dish Bake at 325° for 35-40 minutes. Makes about 24 brownies.
Here's
the nutritional data, as closely as I can figure it. This is per
brownie.
○ Back to Top ○
These delightful mini carrot cakes were a huge hit at our Easter party. I made a batch of cream cheese frosting and let folks add it themselves. The carrot cakes are wonderful with or without frosting! Additionally, they are gluten free! Many thanks to Elanas Pantry for such wonderful recipes! The Recipe.
Gluten Free Carrot Mini Muffins 1. In a medium bowl, combine coconut flour, salt, baking soda and cinnamon 2. In a large bowl, blend together eggs, oil, yacon and vanilla 3. Blend dry ingredients into wet, then fold in carrots and currants 4. Grease a mini muffin tin with grapeseed oil and then dust with coconut flour 5. Spoon approximately 1 teaspoon of batter into each greased mini muffin cup 6. Bake at 350° for 10 minutes 7. Cool and serve
○ Back to Top ○
This terrific treat comes from www.FreeCoconutRecipes.com The Recipe.
1/2 cup creamy
peanut butter of your choice
Mix peanut butters, honey or brown rice syrup, oat flour and coconut flour until it forms a dough-like consistency. (add more peanut butter or flour to get the right consistency) Roll into balls – size of your choice and put on waxed paper lined cookie sheet. Melt the chocolate chips with coconut oil – if you want to have the Peanut Butter Balls completely covered with chocolate, double the chocolate and coconut oil. To not completely cover the balls, use a table spoon and drizzle chocolate on each ball until you get the amount of coverage you’d like. To completely cover them, throw the balls in the chocolate and remove with spoon- cool on waxed paper. Refrigerate if your house is hot but let warm up a bit before eating.
○ Back to Top ○
This terrific treat comes from http://www.elanaspantry.com/blueberry-muffins/ The Recipe.
Gluten
Free Blueberry Muffins
In a
small bowl, combine coconut flour, salt and baking soda
○ Back to Top ○
This recipe is super easy to put together, and can be made ahead for weekly breakfasts. I bake them up on Sunday. My best friend, and the world's greatest personal trainer, Tab, taught me how to make these... you can easily vary the ingredients to suit your tastes. The Recipe. (makes 36)
Egg
Beaters - 32 oz carton (or use whole eggs)
Preheat
oven to 350°
Serving Size: 2-4 (each muffin contains less than 1 egg and about 100 calories). Substitutions... Tab's original recipe used Eggs & Canadian Bacon. You can add or remove veggies, or meats or seasonings as you like. You can add more Egg Beaters if you prefer a more egg-y muffin.
Here's
the nutritional data, as closely as I can figure it. This is per
muffin.
○ Back to Top ○
This recipe comes from Sunflower27 at The Eat Clean Diet/Kitchen Table. The cookies came out a bit dry, next time I will slightly increase the coconut oil, or maybe add applesauce, but they've got a great flavor! The Recipe
Ingredients
○ Back to Top ○
This recipe came to me from the wonderful women at the Tosca Reno Forum and has only one ingredient! I didn't believe it until I tried it! And it's AWESOME! Bill was right beside me, watching as I prepared this wonder, and he was stunned! It is truly wonderful! We added sliced fresh banana on top with melted coconut oil peanut butter fudge... so yummy! You can also use it as a pie filler... just make your crust out of crushed nuts & a little honey or agave, and fill with the "ice cream". The Recipe Ingredients: Frozen Bananas
Directions:
Take several ripe bananas and peel them. Break them into 1-2 inch sections and put in a gallon size Ziploc freezer bag, toss in freezer and allow to freeze solid (I keep a bag in there all the time so I have it whenever I want it). When you're ready to make your ice cream, pull out the bag and put the desired amount (figure 1 small/med banana for each person) in a food processor. Hold on tight, as it shakes a bit when you first turn it on (LOL!). Give it about 3 or 4 minutes and you'll discover you have a wonderful ice cream! Suggested Toppings/Additives:
Cinnamon ○ Back to Top ○
This recipe came from the May/June issue of Clean Eating Magazine (pg. 33). When I made the recipe it was a bit dry... not tomato-y enough for our tastes, so I added a big can of crushed tomatoes and let it simmer for about 45 minutes, and Voila! Amazing sauce! It's awesome, put it on pasta, on a baked potato or sweet potato, or over rice, bulgur, whatever! Yum!
The
Recipe (with my edits)
view original
recipe here
Ingredients
Heat
olive oil in a large pan and sauté onions until lightly browned, 3-4
min. Stirring often. I further added a package of Jennie-O 99% fat free ground turkey (browned) to boost protein. *NOTE. I simmered on low for 45 minutes.
○ Back to Top ○
This recipe is a family tradition and a mainstay of my childhood. With a minor tweak, the recipe is now clean. Potatoes have gotten a bad rap, but when enjoyed in moderation, they do have a place in the clean eater's life. They're full of B6, Vitamin C, Potassium, Manganese, Magnesium and more! (nutritional info below).
Our Family
Recipe
Ingredients
■
Boil potatoes. You can peel & quarter them before boiling, or
just quarter them and peel off the skins after boiling. Drain and
allow to cool.
*The original recipe calls for mayonnaise. Back in
the day, Mayonnaise's ingredient label went something like this: eggs,
oil, vinegar, sugar, salt. Today, that label is full of
unpronounceable items. Not exactly clean eating. You can either make
your own mayo with clean ingredients, or make a careful selection at the
store being mindful of preservatives & additives.
○ Back to Top ○
This recipe is a family tradition and a mainstay of my childhood. With a minor tweak or two, the recipe is now clean. We've always served this with Ruffles Potato Chips. In recent years, I have chosen to not eat potato chips and used sliced raw turnips, carrots, celery, and cauliflower instead of chips. Ruffles now offers a "Natural" chip that is as clean as a chip gets :-)
Our Family
Recipe
Ingredients
■
Peel cucumbers. Cut them in half lengthwise, then half widthwise.
Using a spoon, scoop out and discard seeds. Grate cucumbers. Place
in a colander/sieve and allow to drain for about 10 minutes.
Nutritional info is based off 1 ounce... I consider a serving
to be about 2 tablespoons or 2 ounces, give or take. So for a 2 Tbsp
serving, double the numbers you see below.
○ Back to Top ○
This is a
terrific summer drink - light & refreshing, and if you make it with
mineral water (instead of club soda), it's totally clean. Most mojito
recipes call for either equal amounts of rum & club soda, or mostly rum
with a splash of club soda. This is much lighter. My Recipe
Ingredients (Per Drink)
■
Muddle (or bruise - you don't have to mash it, just use a wooden
spoon and hit the leaves in the bottom of the glass until the scent
becomes strong, it just takes a moment) ○ Back to Top ○
|
|||||||||||||||
home | journal | chelle's blog | food plan | recipes | tools | photos | workout music | healthy heroes | legal
chelle @
RecipeForFitness.com
© Copyright InkGoddess 2009-2010. All Rights
Reserved.

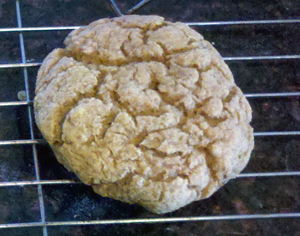
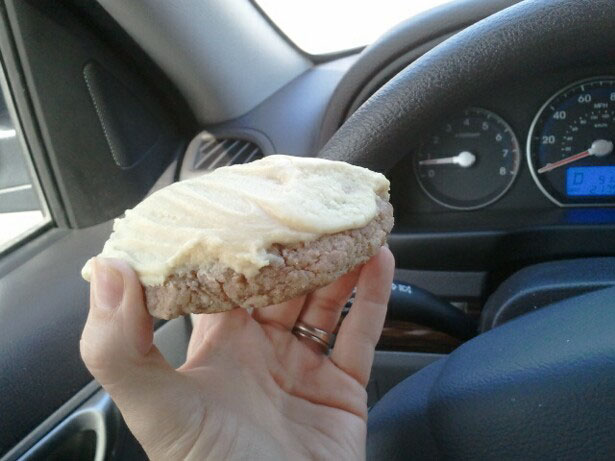
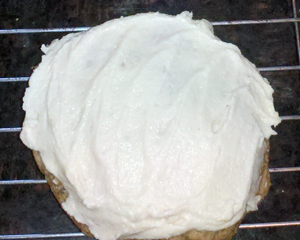
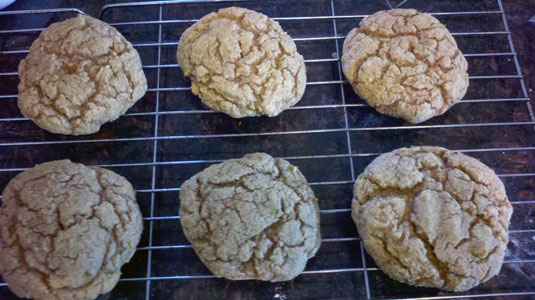
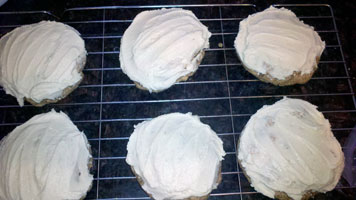
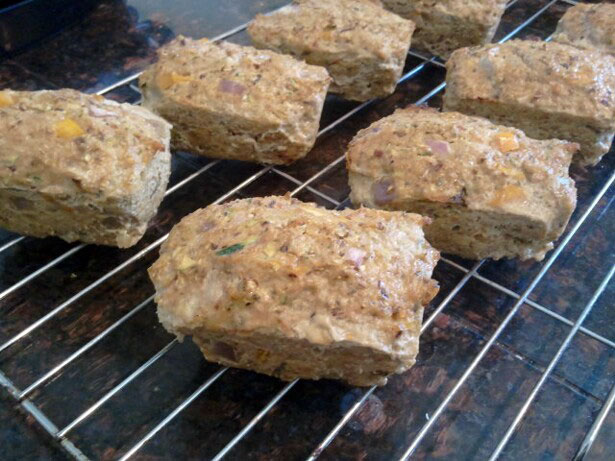
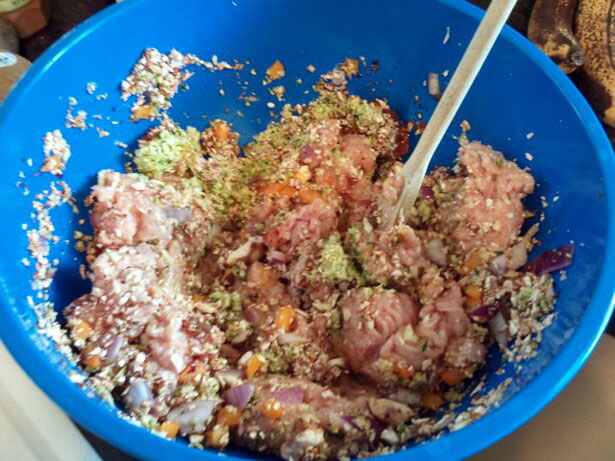
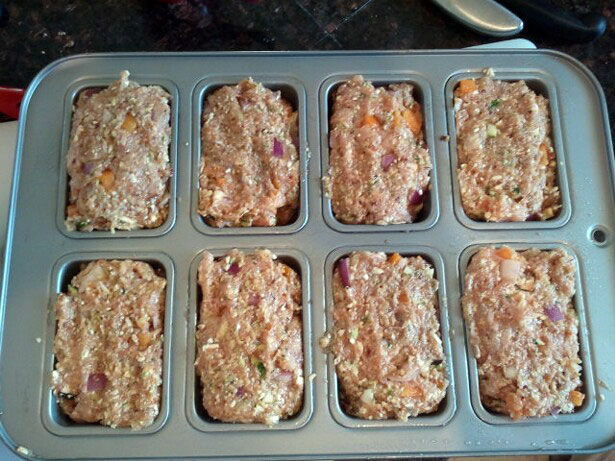
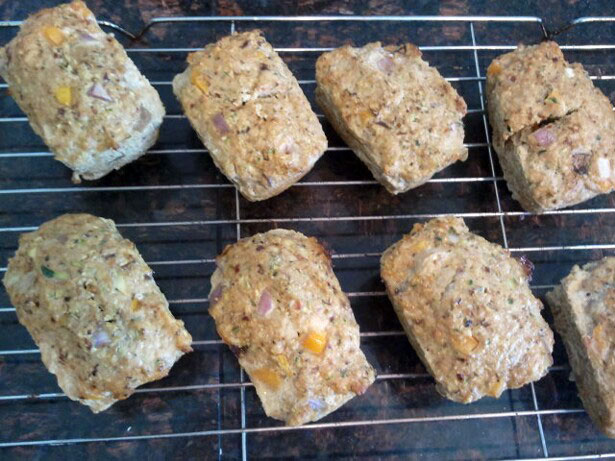
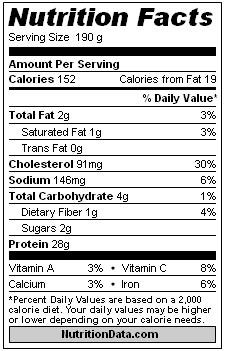
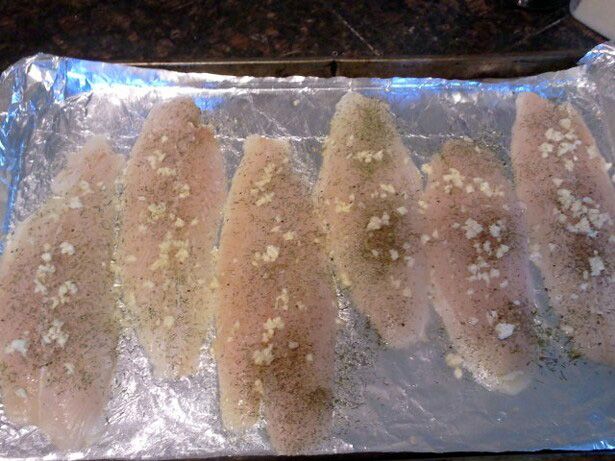
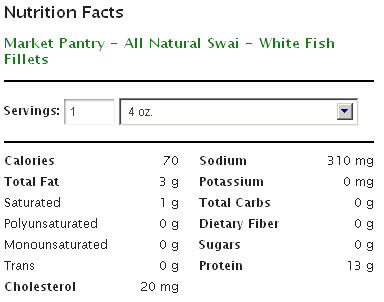
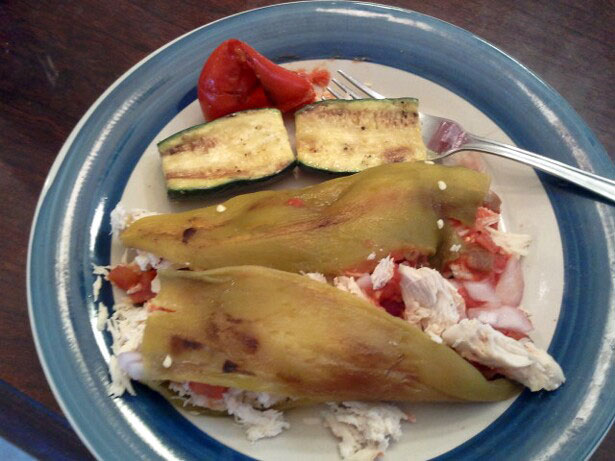
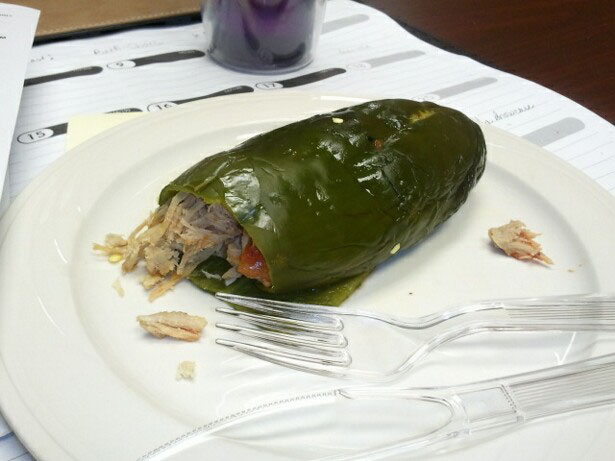
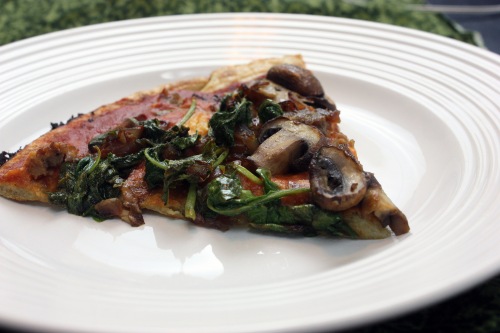

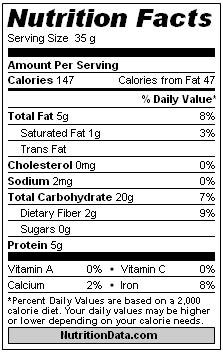
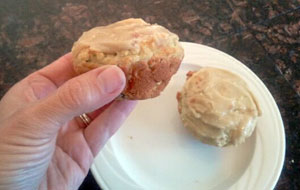
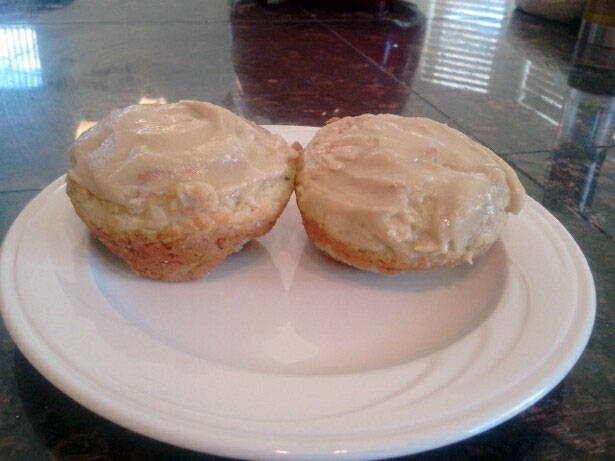
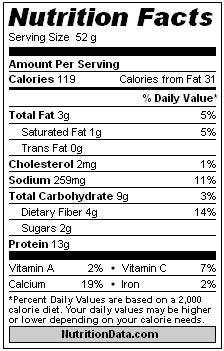
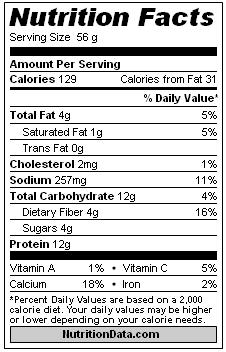
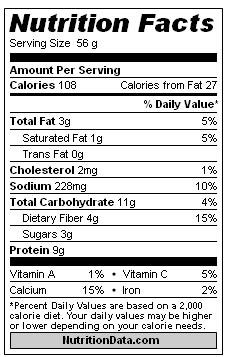
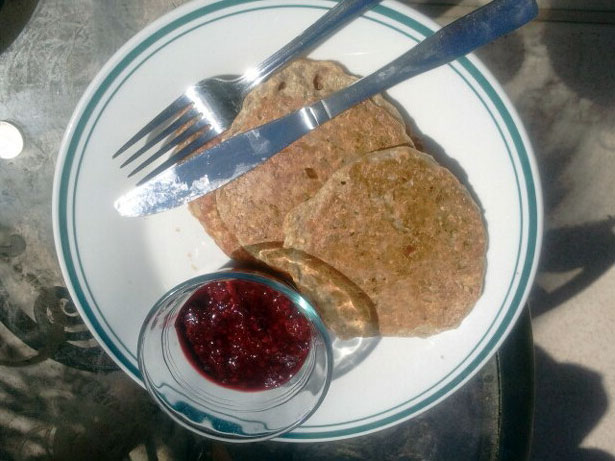
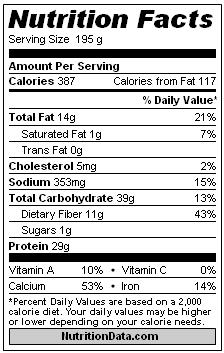
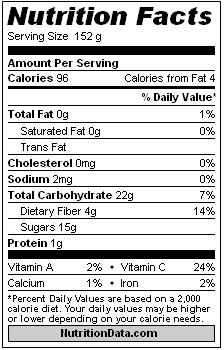
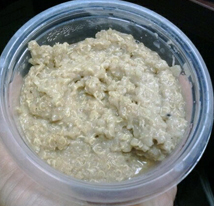
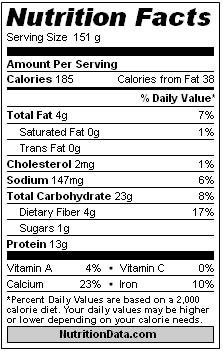
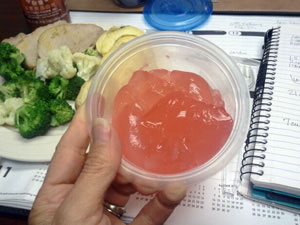


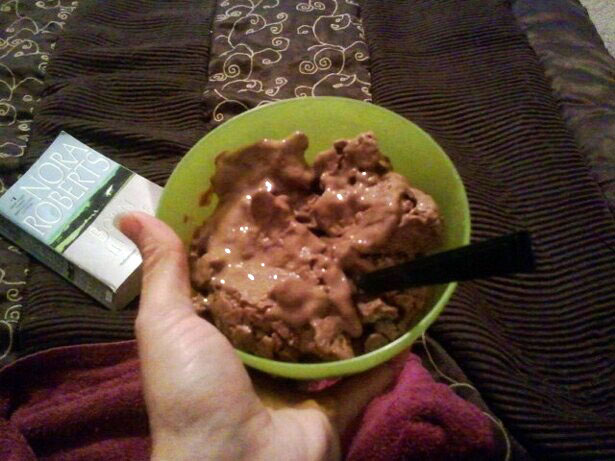
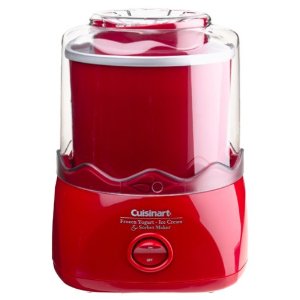

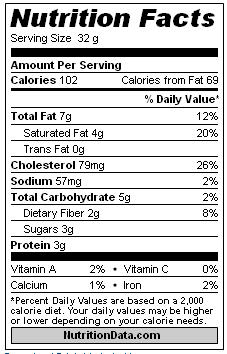

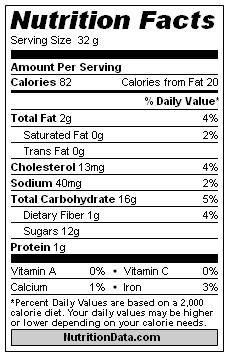
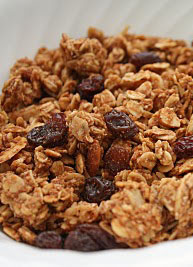
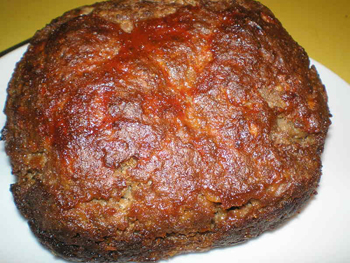
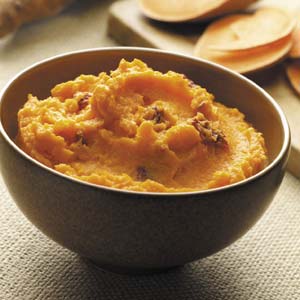
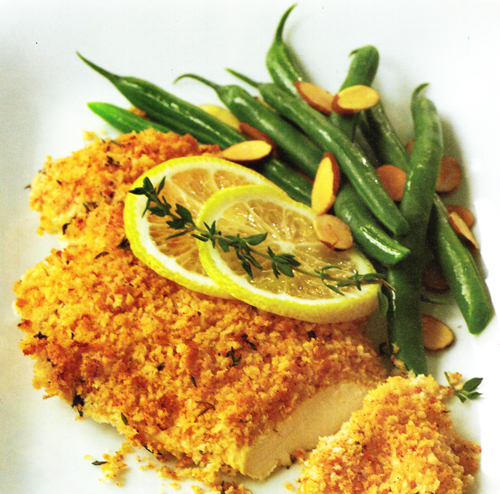
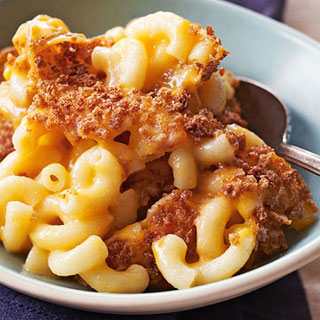
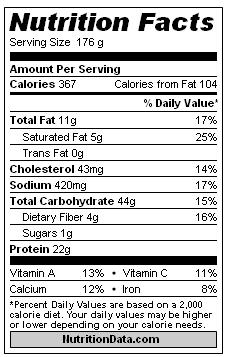
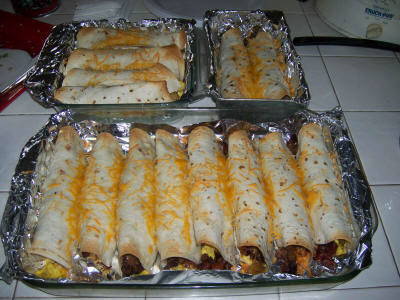
 Crockpot
Beef Stew/Soup
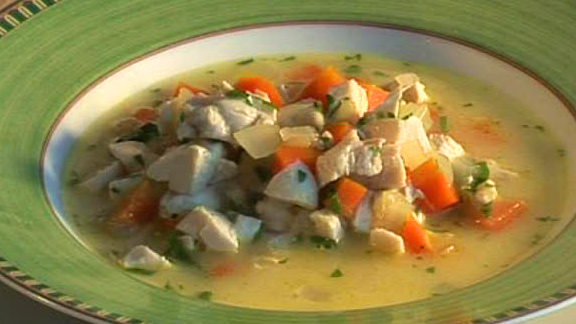
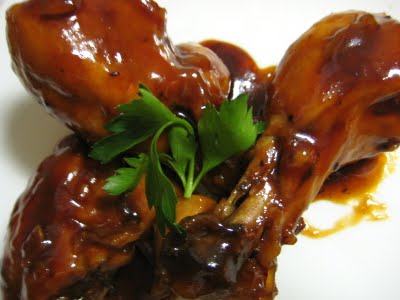
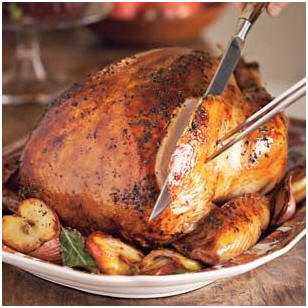

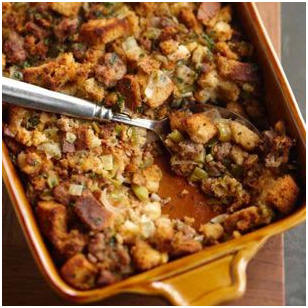
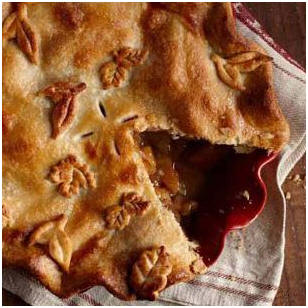
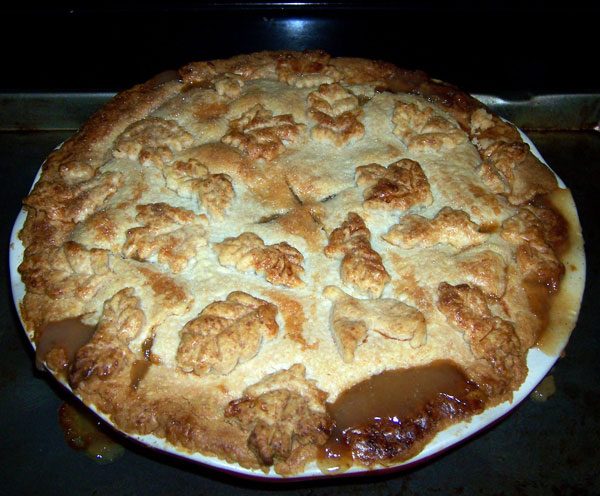
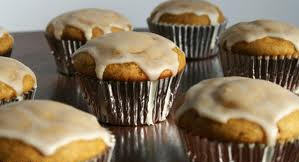
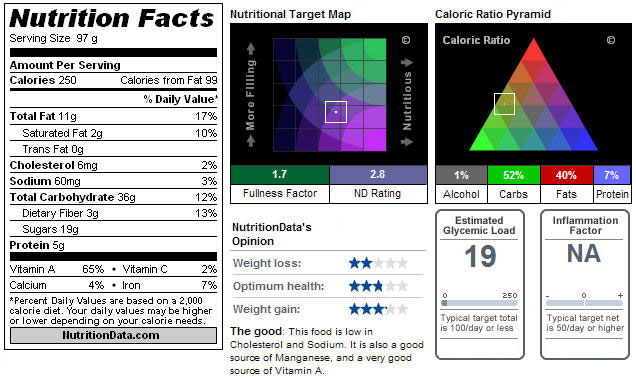
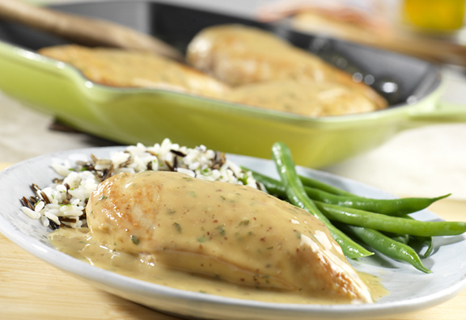
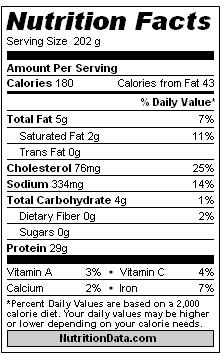
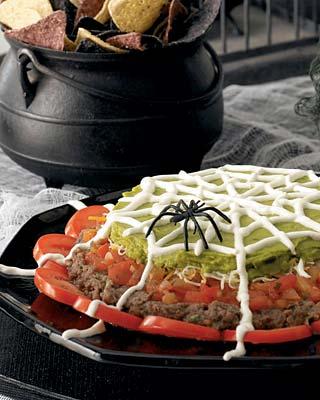
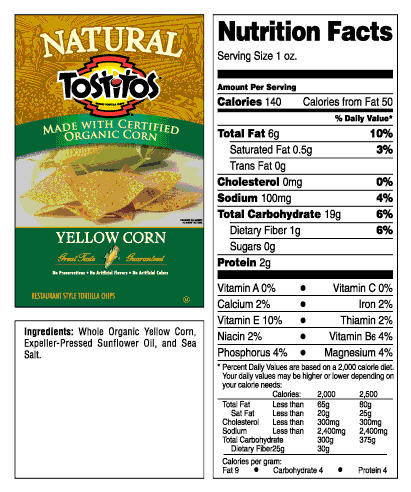
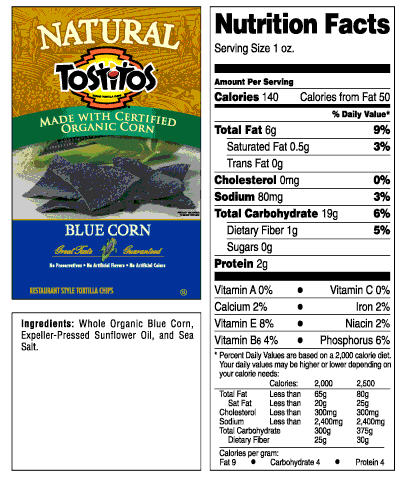

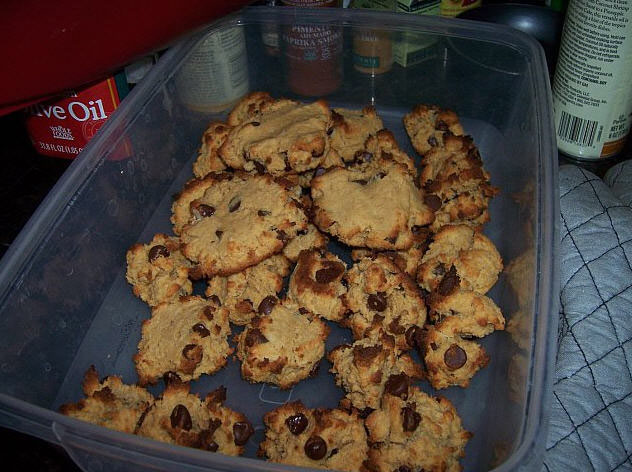
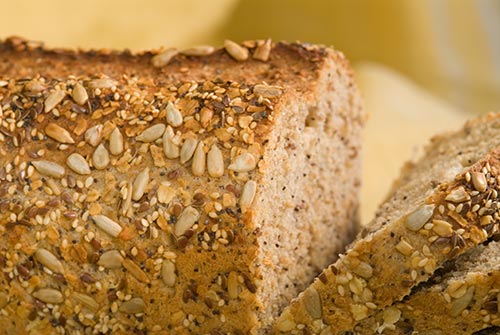
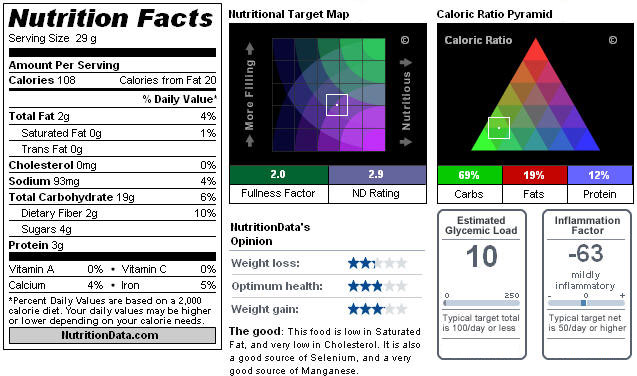
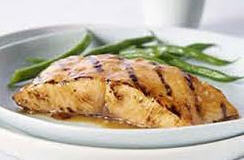
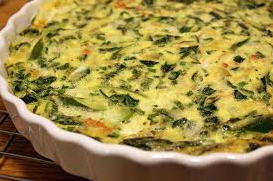
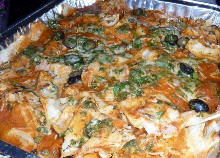
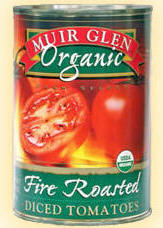
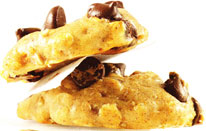
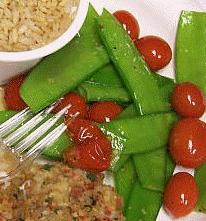
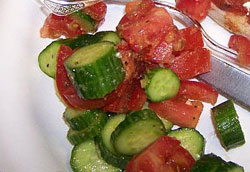
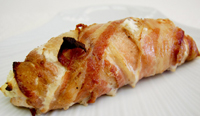
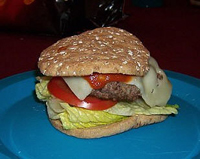
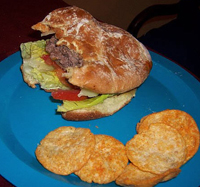
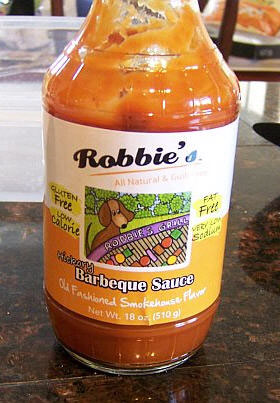
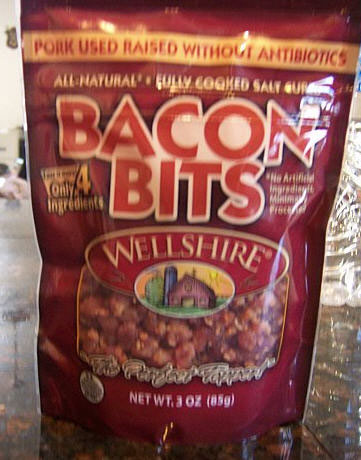
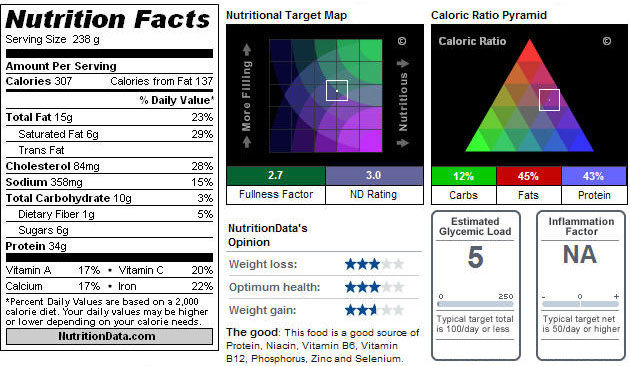
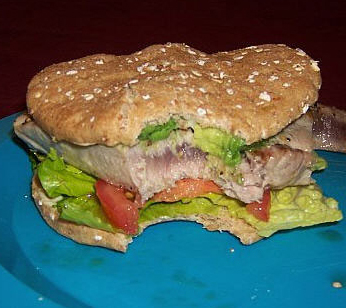
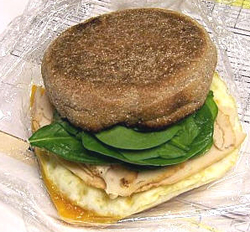
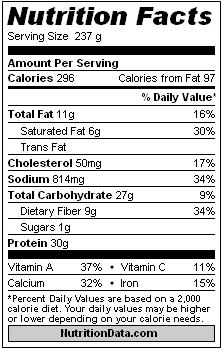
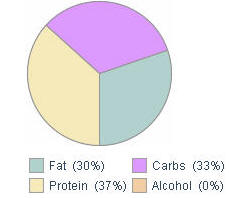
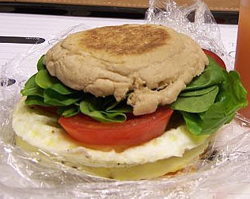
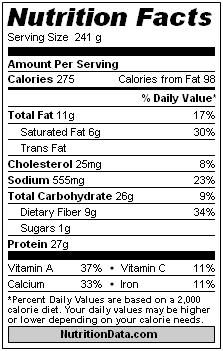 Nutritional Information:
This is based on using a Thomas' Light Multi Grain English Muffin,
100% Egg Whites and Tillamook Medium Cheddar Cheese. The
sodium count can be reduced by changing either the muffin or the
cheese to a low-sodium variety.
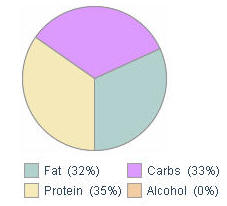


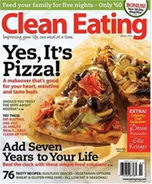


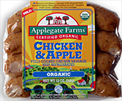
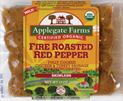
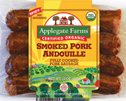




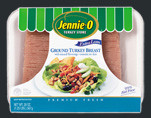
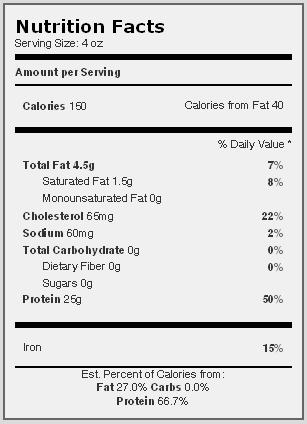
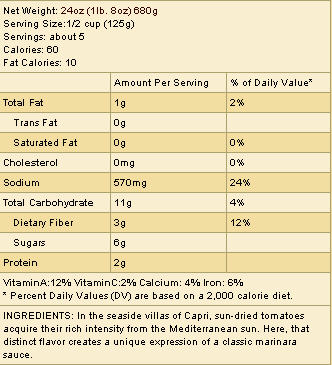
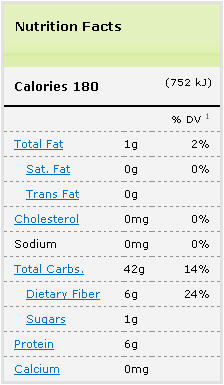
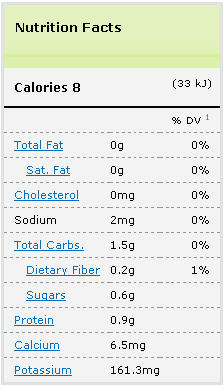
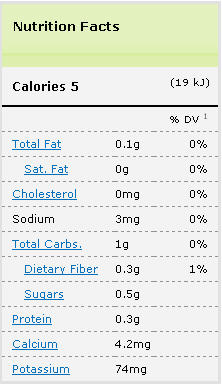
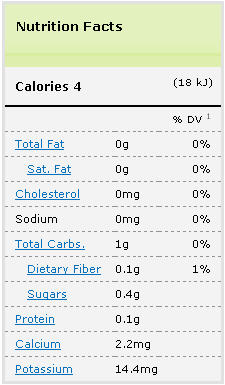
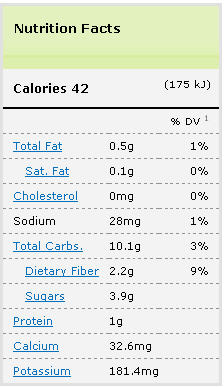
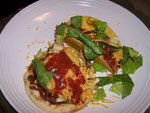
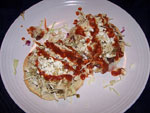


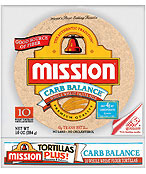
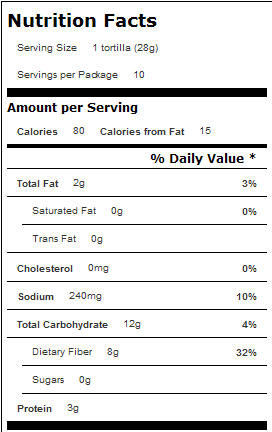


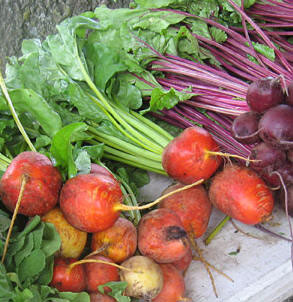


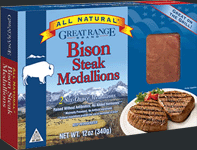



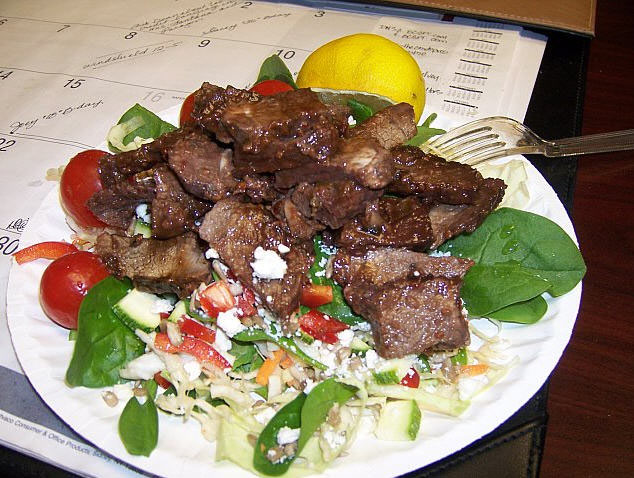
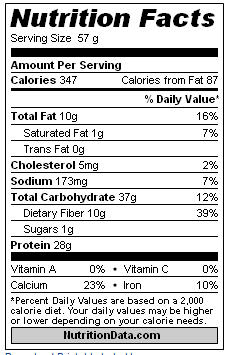
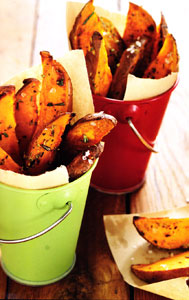
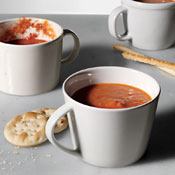
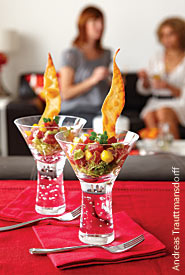
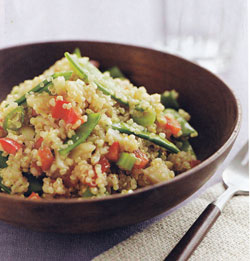
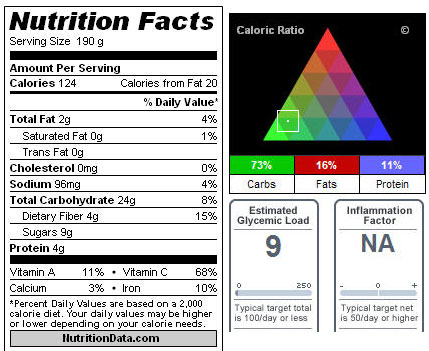
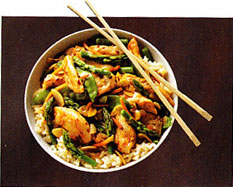
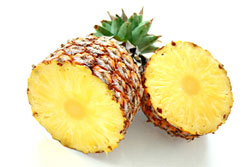
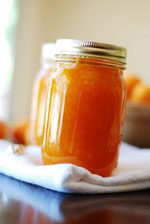
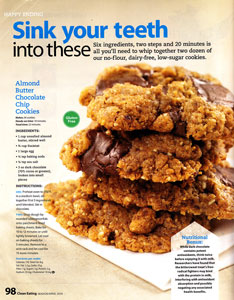
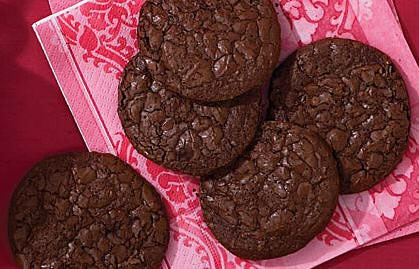
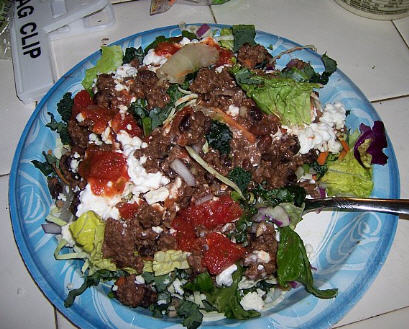
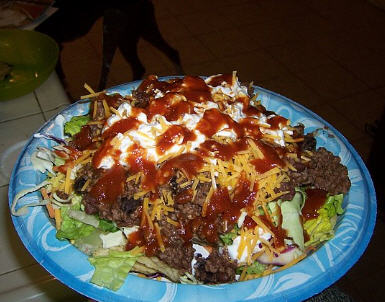
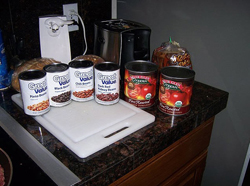
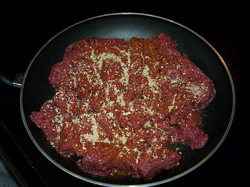
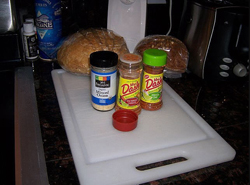
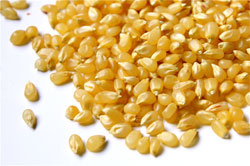
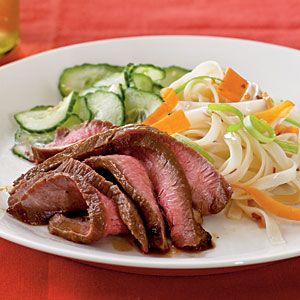
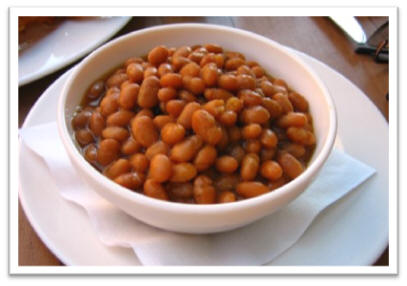
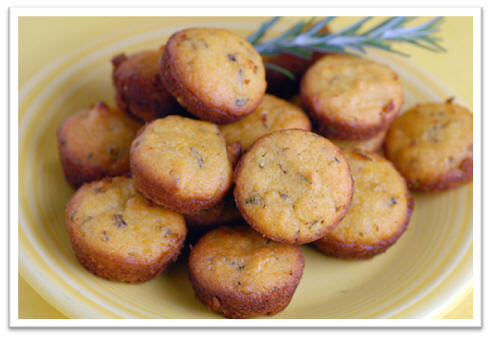
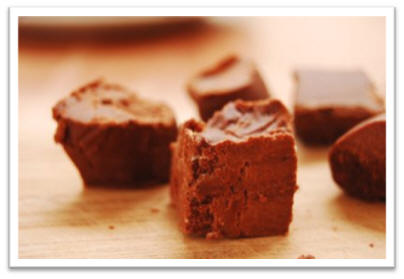
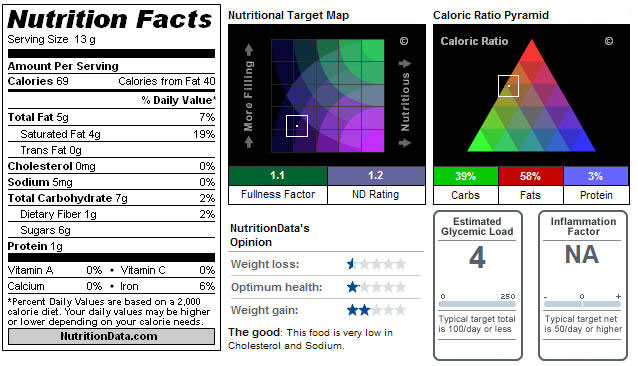
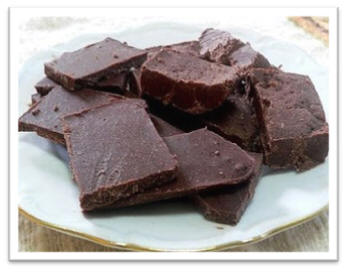
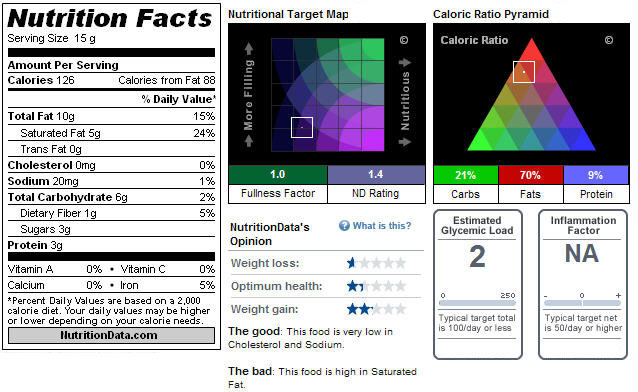
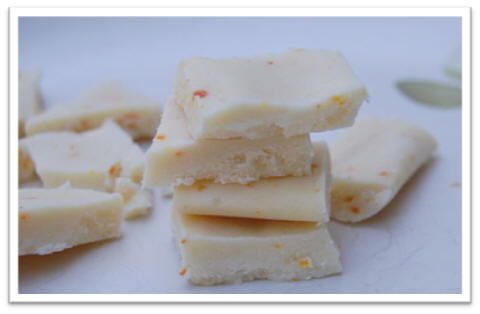
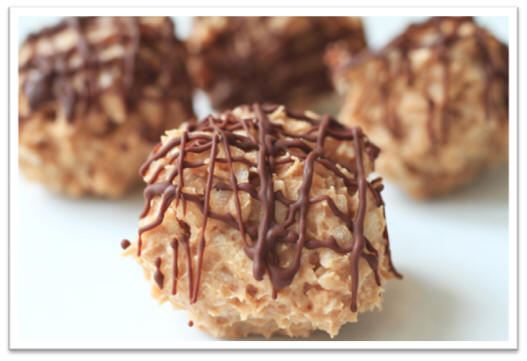
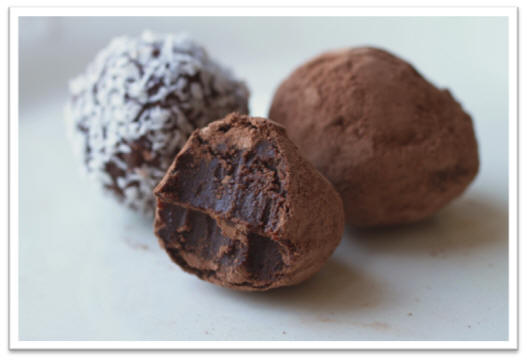 Chocolate
Balsamic Truffles